
Welcome to the important news site.
Microsoft Word is one of the most widely used programs in the Office suite that countless users deal with on a daily basis. A number of internal features of this program can save you a lot of time and make many things easier than before.
It is clear that there are no hidden or strange features in Word; But to activate them, you have to search in the right place. Perhaps using all the things mentioned in the following text at once will not help much; Rather, each user should use appropriate features according to their needs.
Hide toolbar and show full screen
Word software includes various features, most of which can be accessed through the upper toolbar of the program. Of course, this same toolbar can become a distracting factor for users and for some, it looks visually annoying. As a result, to prevent such a phenomenon from happening, you can try to hide the toolbar and display the full page content.
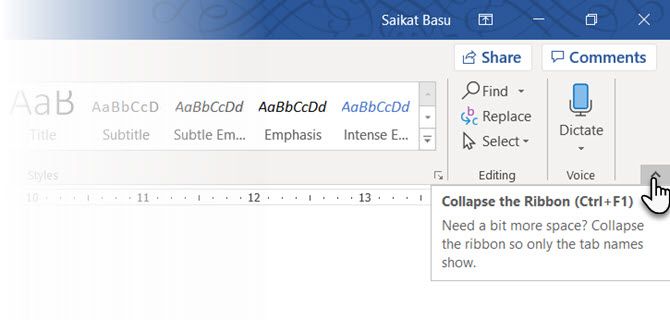
To hide the toolbar, you can use the combination key Ctrl and F1, which makes the toolbar disappear. You can also enable a feature that allows the toolbar to be automatically hidden. To do this, first click on the Ribbon Display Options icon next to the minimize button and then select the Auto Hide Ribbon option as shown in the image below.

Distraction Free reading mode is considered a more advanced feature in Word that has been built into the Office suite by Microsoft since 2010. Although this feature was originally intended for touch screens; But it can also be used on desktops and laptops. To access the said feature, first press the Alt key and then press the combination key W + F.
Alternative method to activate the reading mode without distraction is to click on the View section in the upper toolbar and then select the Read Mode option. Also, the Read Mode key is available on the right side of the status bar. In this case, you can use your fingers (on touch screens) or the mouse to zoom in on the content so that the various elements are enlarged according to the size of the screen.
Using Outline Mode
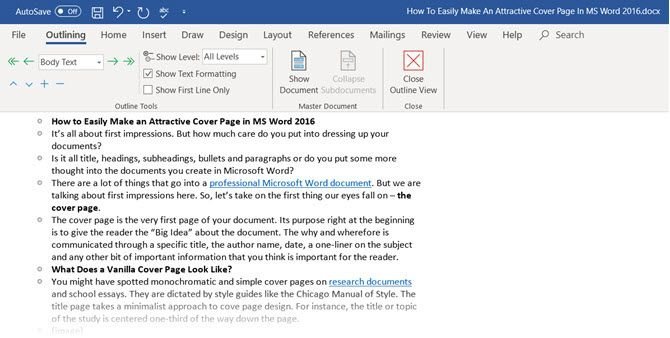
Outline mode is a suitable option to start writing an article, where you can focus on general ideas and continue to develop them. In this mode, the borders around the page are lost and the lines are displayed as a list. To access it, first click on the View tab in the toolbar and then select the Outline option from the left.
It is said that using Outline mode in long articles can have a positive impact on productivity by up to 50%. In complex texts, this feature can be used to change the structure of different parts. Also, the dedicated Outlining toolbar allows the user to control the text more easily.
If you want to constantly refer to certain parts in a long article, Outline mode will be the right option for you. Also, the mentioned mode is useful for writing drafts quickly and it is also used for changing the order of various documents such as reports. The possibility of using the drag and drop feature for titles can save a lot of time for the user, and all the texts under the same title will be moved with it.
Write anywhere you like
Sometimes, while writing, a sudden idea may come to the user’s mind and he intends to write it quickly in the desired place. Thanks to the Click and Type feature, you no longer need to worry about where the mouse pointer is or choosing the correct lines; Because you can create text anywhere in a document. This feature is available to users from version 2002; However, many people are unaware of its existence.

Using the possibility of Click and Type is only possible in Print Layout or Web Layout visual mode and is considered a suitable technique for freestyle writing. It is also possible to add images or tables to texts more easily in this way. Some users also use it as a tool to create a mind map.
Easy conversion of tables into charts
Undoubtedly, the use of diagrams in presenting an article can have a much greater impact than tables full of figures and draws the reader’s attention. In this regard, a special feature for converting tables to charts has been considered in Word software, which makes doing such work easier and faster.

To begin, first click on the Insert tab on the top toolbar of the program and then click on the Object option. From the drop-down menu that appears, select Object to display the Object dialog box. The list of selectable items will be available in Object Types, from which you should select Microsoft Graph Chart and finally click OK.
Now Microsoft Word can display tabular data as column charts. To change the format of a chart, double-click on it and then right-click on the white area and select Chart Type. Now you can choose the desired chart among the displayed items.
Writing equations
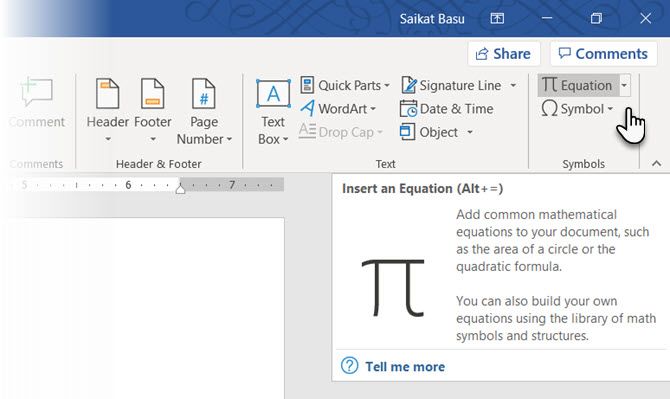
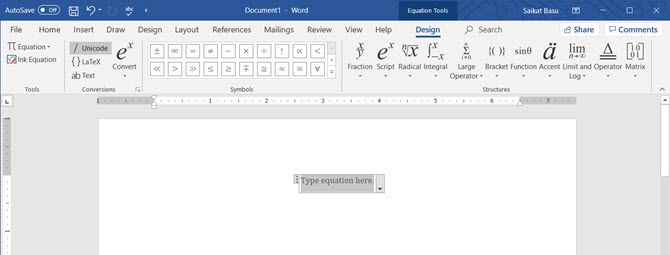
Excel is not the only program in the office suite that supports formulas and equations. The equation editor tool is one of the main features of Microsoft Word software, which is called Equation in its final version. To access this tool, first click on the Insert tab in the upper toolbar of the program, and then click on Equation and select Insert New Equation.
You can write your own advanced formula using the equation toolbar. The tools needed to write mathematics, physics and chemistry equations exist in Word and are responsive to a wide range of users. Also, default structures are readily available and can be used to save time.
Professional use of clipboard
Clipboard is the place where copied items are stored. Office clipboard and Microsoft Word can keep the last 24 copied items in its memory and it is possible to use it jointly among different office programs. To access this feature, click on the Home tab in the toolbar and then select the small arrow icon next to the Clipboard title. You can also press Ctrl + C twice in quick succession to access the clipboard panel.
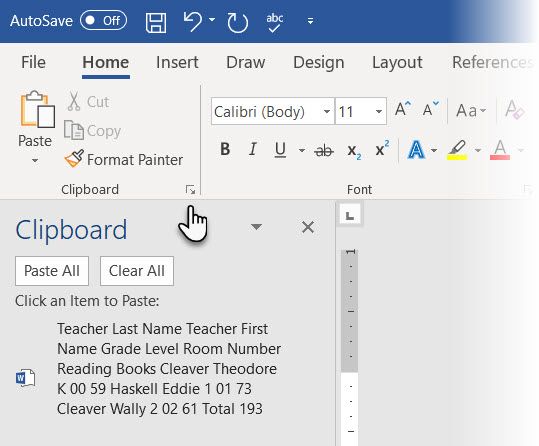
The high capacity of the Office Clipboard allows users to have several items available at the same time and can easily move them between different parts of a text or different files. Using the Options menu in the clipboard, you can control its various settings. For example, there is a special option to display the number of items stored in the clipboard in the status bar, which can be disabled by the user; But it is active by default.
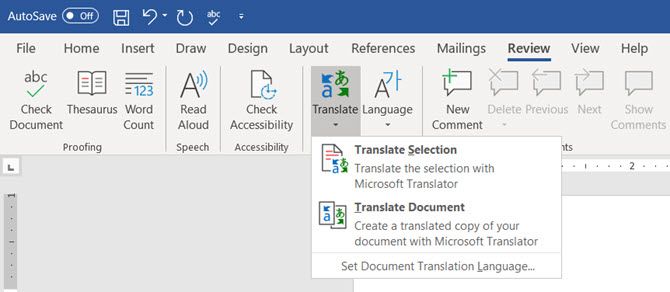
Fast translation of different languages
Office suite software uses the Microsoft Translator tool to translate various texts. To access this feature, you must click on the Translate option in the Review tab. It is possible to translate a word, sentence or even the entire text, and users will not feel any limitations in this regard. You can also have the translated text in a separate file.
Translator tab is displayed on the right side of the screen and you can select or change the target language. Also, with the help of this sidebar, it will be possible to highlight desired words and display their meaning.
Change font mood
The Kerning feature is intended to change the distance between two letters, which can give a better visual effect to texts. Every type of font and text structure needs a space that is proportional to its content, and such a problem is more visible when using large fonts. Of course, the Kerning feature is disabled by default in Microsoft Word software. But using this mode can help users in various cases; including shortening the length of words and sentences in files that have a page limit.
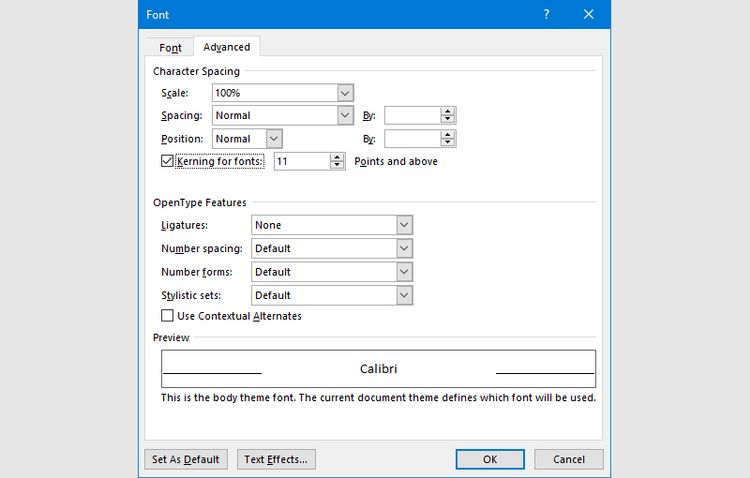
In the Home tab, you can access the menu related to Kerning by clicking on the small arrow next to the Font title. Also, pressing the combination key Ctrl + D is an alternative way. Next, go to the Advanced tab and then check the Kerning for fonts option. Now you can achieve your desired size for different fonts by trial and error with different values. Of course, note that some fonts will not be compatible with the Kerning feature and due to the continuity of many letters in the Persian language, it is of little use for texts with
check file content
Today, most of the features of Microsoft Word software are based on the collaboration of several users; But users should always be careful not to share sensitive and personal things in their files. The Document Inspector feature can help people to prevent the disclosure of confidential information by checking the document. Normally, when creating a new file, some user-related data is automatically added to the document. The said feature can remove such items before sharing.

To access the Document Inspector feature, first go to the File tab and then click on Info in the left panel. Next, select Inspect Document and click Check for Issues. Finally, click the Inspect Document button. By ticking some options, you can also check the hidden contents of the program. After the process is completed, all sections containing sensitive information are marked. By pressing the Remove All button, you can remove all the data of different categories and then share your file.
Using hidden text
Hidden text refers to characters that will not be visible in the final output but can be useful in various cases. For example, when asking questions, you can write down the correct answer in the form of hidden text in the margin or note the points to be followed when printing the file. Hiding confidential information that you do not intend to be seen is one of the other benefits of hidden text.
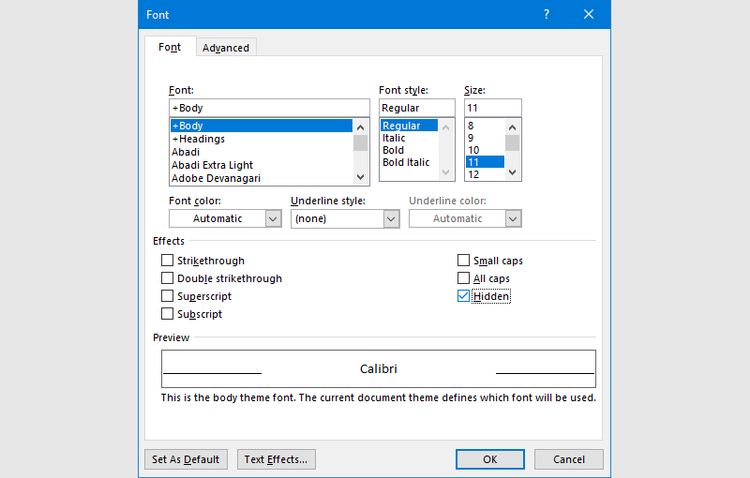
To hide or reveal a text, first select the desired section and then from the Home tab, click on Font Dialog Box and then click Font. Next, tick next to the Hidden title to be hidden with the text. To print hidden texts, you can go to the Options section by clicking on the File tab and then click on Display. Next, check the Hidden Text and Print hidden text items and finally click on OK.
We hope you enjoyed the Office training materials. Check out our other articles.

