Welcome to the important news site.
Have you received the Windows 10 April 2018 update? If your answer is yes, you should know that probably around 10 GB of your memory is occupied by useless files. For us, this space was about thirty gigabytes!
But why did this happen? In this article, we have addressed the same issue. So stay with us until the end.
Old Windows files occupy memory space
Updating Windows from one build to another is just like installing a new version of the Windows operating system on your computer. So when, for example, you upgrade Windows from Fall Creators Update to April 2018 Update, it’s just like having a new Windows installed on your computer or laptop.
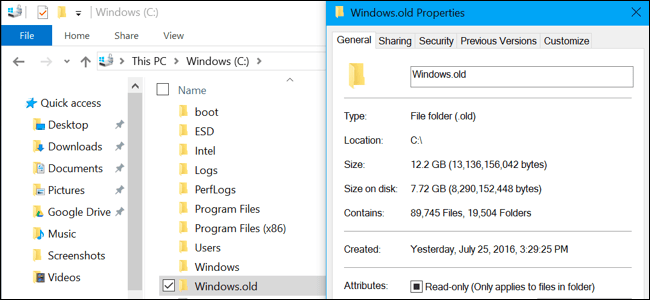
When you upgrade to a new build, Windows creates a Windows.old folder on your memory drive that contains system files from your old Windows. These files, which are in the form of backups, allow you to always have the opportunity to return or so-called “downgrade” to previous versions if you are dissatisfied with the new updates of the operating system.
But these backup files can sometimes take up more than 10 gigabytes of space, which if you have limited memory, you may experience slow operating system and other problems.
Of course, in order to prevent these files from becoming a problem, Windows has made them automatically deleted from the memory after 10 days of the update. However, if you need your memory and you don’t want to wait ten days for cleaning, you can also clean these files manually, which we will teach you later.
WARNING:Only delete files if your Windows is working fine. If you have a hardware or software problem in the new update and delete the old Windows files, you will no longer be able to downgrade to the previous build.
What to do to return or downgrade to older Windows builds?

Fortunately, it is very easy. Go to Settings > Update & Security > Recovery and find the “Go back to the previous version of Windows 10” option. Here you can start the process of returning to the old Windows build by clicking the “Get Started” button.
Cleaning the Windows.old folder with the Free Up Space tool
If you are concerned about the correct operation of the new build of Windows, you can delete the old build files. You don’t need to manually clean it up, and you never should, because in the April 2018 update, Microsoft has provided you with a special tool for this task.
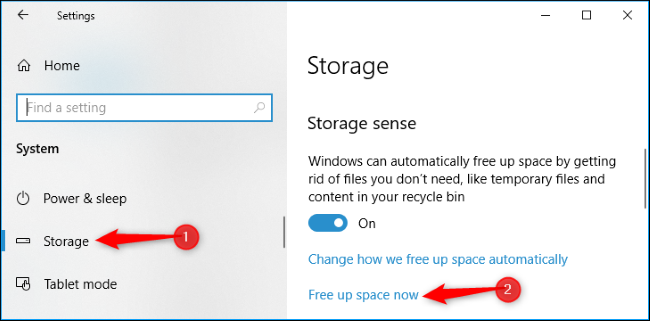
This tool is called Free Up Space, which you can find in Windows settings. To run the tool, just go to Settings > System > Storage > Free Up Space Now.
On this page, tick “(Previous Windows Installation’s)” from the list. Here you can see the amount of memory occupied by old Windows files.
If you don’t see a scene similar to the screenshot below, it means that you have either already deleted old Windows files or Windows has done it for you automatically.
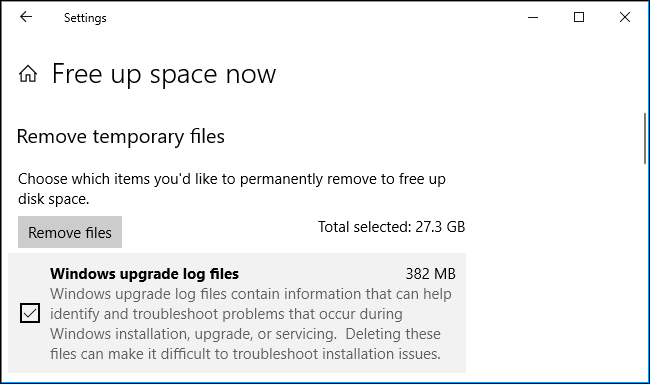
At this stage, you must determine the type of data you want to delete and then click on the “Remove Files” option at the top of the page. It’s done, enjoy freeing up memory space.
Cleaning old Windows files with Disk Cleanup tool
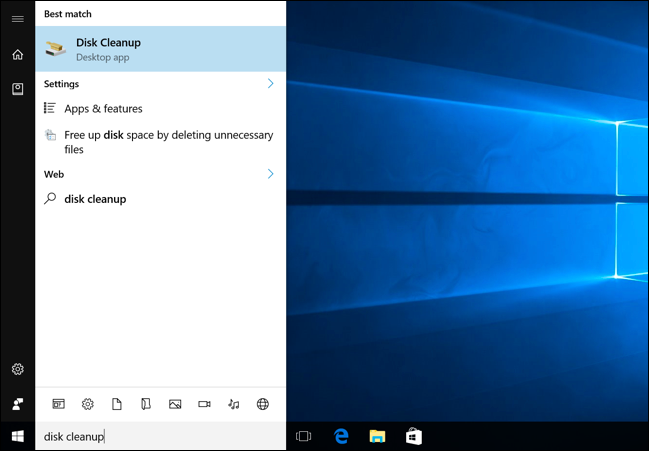
Another method that can be used to clean up old Windows files is to use the Disk Cleanup tool. To access it, enter the start menu and search for Disk Cleanup and then press enter.
In the program window, find Clean Up System Files option and click on it. Then from the displayed list, tick “(Previous Windows installation’s)”. Just like the Free Up Space mentioned above, here you will be asked to select the files you want to clean up.
Now that you have done this, click OK and wait for the tool to clean the files. Note that depending on the size of the selected files, this may take some time.

With this simple method, you can get rid of several gigabytes of extra files on your computer or laptop memory to free up space to store more useful files and have a better experience running the new build of Windows.
Note that in case of cleaning the old files, if you want to return to the old builds, you will have no choice but to reinstall the old builds of Windows 10 from the disk or Installation Media.


