Welcome to the important news site.
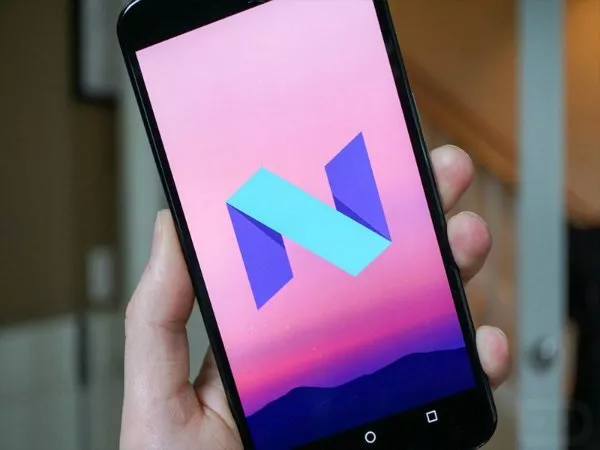
Today is a big day for Nexus smartphone owners. Because if you own one of them, you can get Android 7 version directly or OTA from Google right now.
Android 7.0 Nougat officially available for Nexus 6, Nexus 5X, Nexus 6P, Nexus 9, Nexus Player, Pixel C and also 4G devices based on
If you know how to work with the Android Command Line tool, you can skip the unnecessary wait for the OTA update by downloading the appropriate factory image for your device and flashing it.
But in this way and when flashing the factory image, there are a series of points that you should pay attention to. In this article, we want to teach you how to install Android 7.0 Nougat on Nexus devices through methods other than direct update.
How to install Android Nougat through the Android beta program portal?

One of the ways to update to Android 7.0 Nougat is to choose the option of Android Beta Program, which was available to testers before the release of the first official version of Android 7.0.
Eligible devices to receive Android 7.0 can still participate in the beta program and receive the next updates even after receiving the stable version.
This is because Google has decided to continue releasing Nougat preview versions as it prepares to release the stable and original version.
Devices enrolled in the Android Beta Program will be among the first to receive the stable Android 7.0 Nougat update. The registration process in this program is very simple:
-
Go to the Android Beta Program portal on your Nexus device or Pixel C tablet. /li>
- After that, log in to your Google account.
- Scroll down to the section Your eligible devices.
- Select the device you want to enroll in the beta program and then click on Enrol device.
- Select the correct options to download the OTA.
How to flash a factory image to Android Nougat?
First of all, we need to know the right tool to flash a factory image.
Note: You must do these things on your computer.
The first thing you need to know about flashing a factory image on your Nexus device is to have the Android SDK installed on your computer first. You will also need adb and fastboot, which you can easily download through the Android Studio portal.
- First go to Android Studio page.
- Scroll to the bottom of the page.
- Command line toolsFind the appropriate one according to your platform (Windows, Mac or Linux).
Finally, extract the accompanying files (exe, .zip, and .tgz).
Another thing that you need to know after downloading the command line tool is whether the device you are using is ready for flashing or not. This is a two-step process: you need to enable USB Debugging and unlock your bootloader. If you release the bootloader, it can be said that everything will be ready to flash your device.
First of all, we go to activate developer settings and USB debugging.
Note: You must do these things on mobile.
- Go to your Nexus settings.
- Scroll down to the About Phone/Tablet section.
- Tap on the Build number option seven times in a row until the sentence you are now a developer appears.
- By opening the settings section, you will see a new option called Developer options.
- Click on Developer options
- Make sure that the developer settings section is turned on and the USB debugging status is turned on.
- Check the Enable OEM unlock section.
- Connect your Nexus device to your computer.
- When you connect your device to the computer, you will encounter the message Allow USB debugging. Click on the OK option to complete this part safely.
By going through the above steps, we are done with our mobile device. Now we have to prepare to open the bootloader.
Note: This section is done on your computer and mobile device.
Unlocking the bootloader is relatively simple, but before that, you should know that by doing this, your smartphone will return to factory settings, and this will erase all your applications and saved data. So before doing this, make a backup of your smartphone.
- Turn off your smartphone or tablet.
- Hold the power and volume down buttons together.
- Open Command Prompt (Windows) or Terminal (Mac) via Platform tools on your computer.
- On your computer, type fastboot flashing unlock/. in the terminal or command prompt.
- Hold the Power and Volume Up buttons together to confirm unlocking the bootloader.
- On your computer, type fastboot reboot/..
- Now we can say that the bootloader is opened for you and you can flash the Android 7.0 Nougat factory image on your Nexus device.
![]()
Note:Android 7.0 Nougat factory image is not available yet. But these steps will also work when publishing the image. Another thing is that the steps in this section are done on your computer.
- Visit the Nexus Factory Images page.
- Scroll down to find the Android 7.0 Nougat image suitable for your Nexus device.
- After downloading the desired file, extract it into your Platform tools file.
- Open Command Prompt (Windows) or Terminal (Mac) via Platform tools on your computer.
- In the command line, type adb devices/. to make sure that your smartphone is recognized by the computer.
- Then type the command flash-all. In Windows, this command is in the form of flash-all.bat, and in Mac it is written as flash-all.sh.
Put your smartphone into bootloader mode and connect it to your computer.
Note: On OS X / macOS, the flash-all script will not work properly most of the time and is doomed to failure. Also, this action will wipe your smartphone by default.
By installing Android 7.0 Nougat on your Nexus device using the methods mentioned in this article, you should see fundamental differences compared to Android 6.0 Marshmallow.
Have you installed Android 7.0 on one of your eligible Nexus devices? If you have managed to install this version of Android and have tried it, we do not mind sharing your experiences with us in the comments section.
