Welcome to the important news site.
It doesn’t matter if we are using a computer, laptop or mobile phone, because it has happened to everyone to take a screenshot of the content on the screen. So if you are a Windows 11 user or you want to migrate to it in the near future, you should know how to take a screenshot in it. In this article, we will teach you how to take a screenshot in Windows 11.
You may want to take a screenshot of the entire page or save a portion of it. In both cases, there are different methods in front of you. To know how to take a screenshot in Windows 11, stay with Digiato until the end.
1. Screenshot in Windows 11 with Snipping tool
Snipping is a free tool in Windows that was first introduced in 2002 as PowerToy and then became one of the free tools of Redmond’s operating system. This program is small in size and has a simple and minimalist design and user interface. In addition, it is the best built-in Windows 11 tool to take a screenshot of a specific part of the screen.
To take a screenshot using the snipping tool, you must first go to the search bar of the start menu and search for Snipping tool. Next, choose the best related option. Now the program should open for you. Click the New option to activate the screenshot layer.
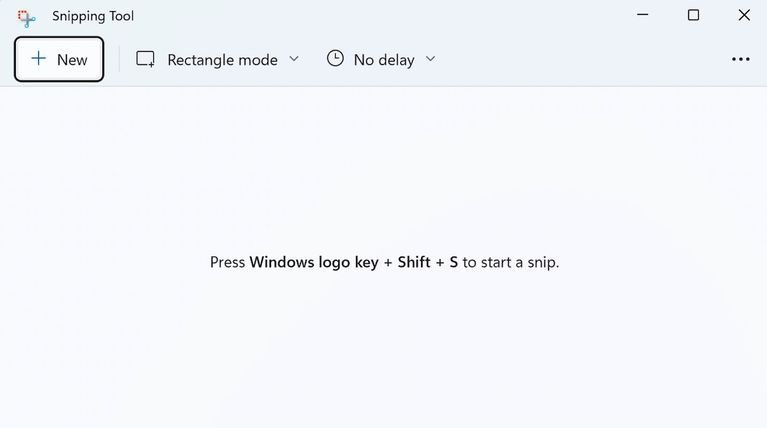
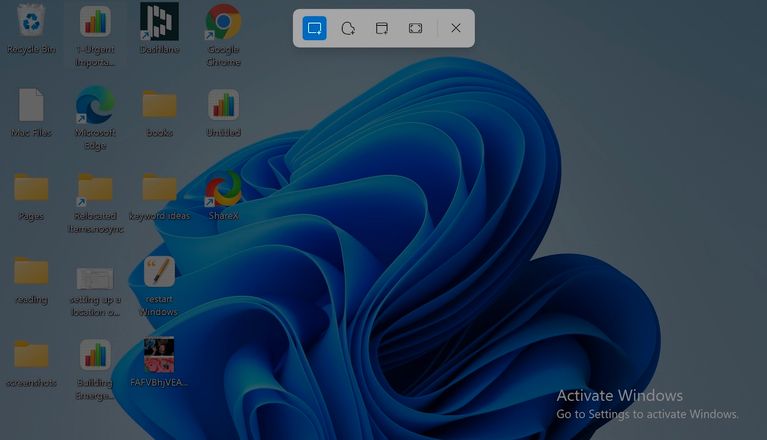
In the small bar that appears for this tool, there are different ways to take a screenshot in Windows 11: square crop, free-form crop, window crop, full-screen crop, and more.
Choose the screenshot method you want and then select the area you want to take a screenshot of and release the mouse pointer. This will save the screenshot successfully.
On the main page of this tool, there is an option to delay the screenshot recording. To access it, go to the Time before snip option with the clock icon and click on the No delay option. Now a drop-down list will open in which different times can be seen.

2. Screen with keyboard shortcut
If you don’t want to go to the snipping tool every time to take a screenshot, you can use a keyboard shortcut to record a screenshot in Windows 11. In the following, we will introduce three keyboard shortcuts for such work.
Screenshot with Print Screen (PrtSc) key
If you want to take a quick and easy screenshot, press the Print Screen button. This will take a screenshot of the entire system screen. In fact, when you press PrtSc, this key takes a screenshot and saves it to the clipboard, instead of giving you a PNG screenshot.
This method works for attaching a screenshot to an email or editing an image before saving it. When you want to turn this image into a proper screenshot, you must first go to a photo editing program and then paste it in this program and finally save it.
Screenshot with Win + PrtSc shortcut
If you want to take a screenshot of the full screen of Windows 11, go for this shortcut. You can easily take a screenshot of the page by pressing the Windows and Print Screen keys, and you can find it in the screenshot folder in the images folder.
Screenshot of active window with Alt and PrtSc keys
If you are one of those people who open multiple tabs and there are several programs on your system screen, the above methods will not work for you because it will take a screenshot of the entire screen, while you might be looking to take a screenshot of only one program.
At this time, you should go to the keyboard shortcut Alt + PrtSc in Windows 11 to take a screenshot of the active window. This will save a screenshot of the active window in the clipboard.
3. Capture a screenshot with the Xbox Game Bar
X Bar Game Bar is another free Microsoft tool that arrived in 2016. Although Microsoft actually provided this tool to help gamers record video games, it also includes screenshot recording capabilities.
Press Win + G keys to start. By doing this, the game bar layer will appear on your system screen. Instead of doing this, you can type the term Game bar in the search bar of the start menu and choose the best corresponding option.

Next, go to the Capture section on the left side of the upper part of the screen and click on the Take screenshot option with the camera icon. Now a screenshot of the screen will be taken and a notification will appear on the right side of the screen. By default, this screenshot is saved in the Videos/Captures folder.
4. Taking screenshots with third-party applications
Although Windows built-in tools can be sufficient for many users, sometimes they are not as good as they should be. For this reason, you may have to go for third-party programs. In this regard, we want to go to two open source programs for this: ShareX and GIMP.
1. ShareX
ShareX First launched in October 2007 as a free screenshot and text recording tool It was released for Windows computers. From that time until today, the popularity of this tool has increased and it is considered one of the best screenshot programs for Redmond’s operating system.
To use this app, you must first go to its official site, download it and install it on your system. By running the program, various shortcuts will be placed in front of you in the main menu.
On the left side, you can see different settings that you can try. For example, by clicking on Tools, several editing options such as color picker, page color picker and image editor are available.

Similarly, there is an After capture tasks option in the left menu, by which you can predetermine what you want to do with the screenshot after it is captured.
For example, you want to save a file or you are looking to save it to the clipboard. Or, instead of saving them all, you want to open the screenshot in an image editing program. Do all these things in this section.

You can do this and much more from the ShareX main menu.
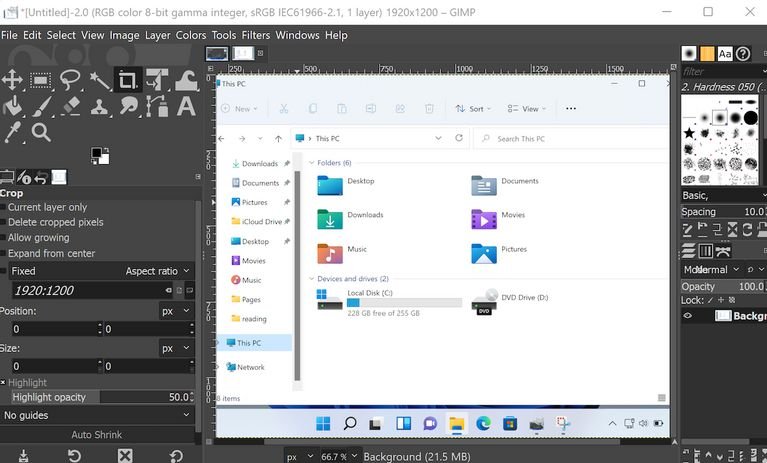
2. GIMP
GIMP is another free and open source program that can help you take screenshots in Windows 11. However, since GIMP contains several advanced tools, it is often referred to as an image editing program. However, you can also use it to record a screenshot.
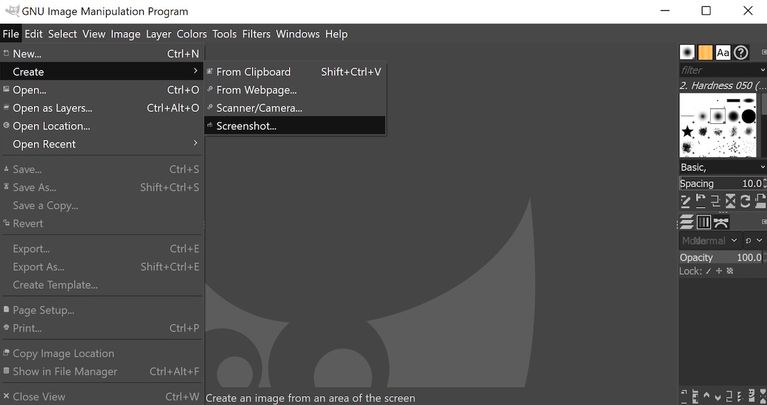
To get started with GIMP, you must first visit the download page Go ahead, download it and install it on your system. Then do the following steps:
- Now run the program from the main menu and go to File > Create > Screenshot.
- In the next window, select the settings you want and click on the Snap option.
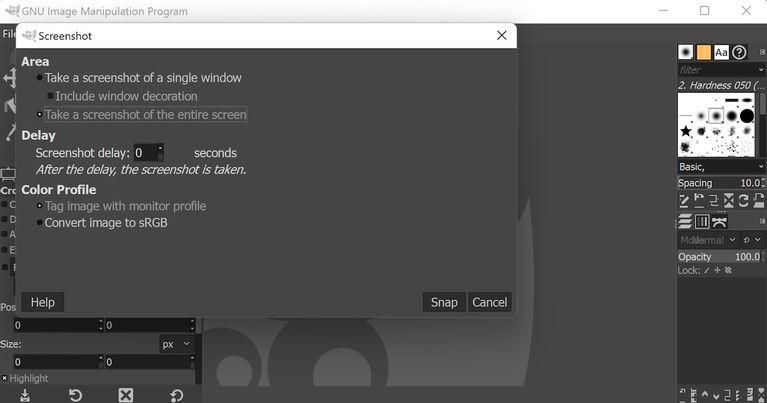
You can delay taking a screenshot by several seconds through GIMP. This program also allows you to switch pages to go to the desired window, if this feature is not available, you will take a screenshot of the GIMP program itself.
If you are satisfied with the screenshot, you can save it via File > Export As. Choose a location to save it, write a name for it and finally click on the Export option. Your screenshot is saved successfully.
Register screenshot in Windows 11
With the above methods, you can take a screenshot easily and as quickly as possible in the latest Microsoft operating system.