Welcome to the important news site.
Defining the partition is one of the first steps that must be done when installing a new operating system on the hard drive. In Windows, a partition is usually chosen to install the operating system and maintain system files and software, which is marked by default with the letter C.
Although it is possible to create only one partition on the hard drive, it is usually recommended to store non-system files in other partitions to prevent the device from slowing down over time. Partitions can also be used to create multiple boots, which allows the use of multiple operating systems at the same time. Some partitions are only intended for data recovery or installation of troubleshooting tools. However, partition management in Windows 10 may sometimes become a bit difficult; But users can easily organize their system partitions only by mastering several items.
Hard partitioning in Windows 10
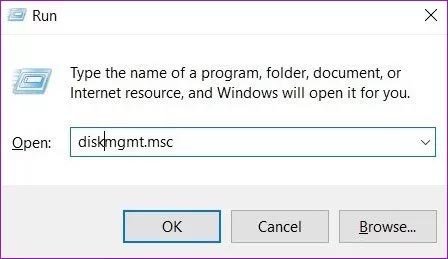
If you have already tried partitioning your device’s hard drive or you want to divide a partition into several new partitions, you can use Follow the mentioned steps to achieve your goal. Press Win + R to start the Run tool. Now type the word diskmgmt.msc in the specified field and then select the Ok key.
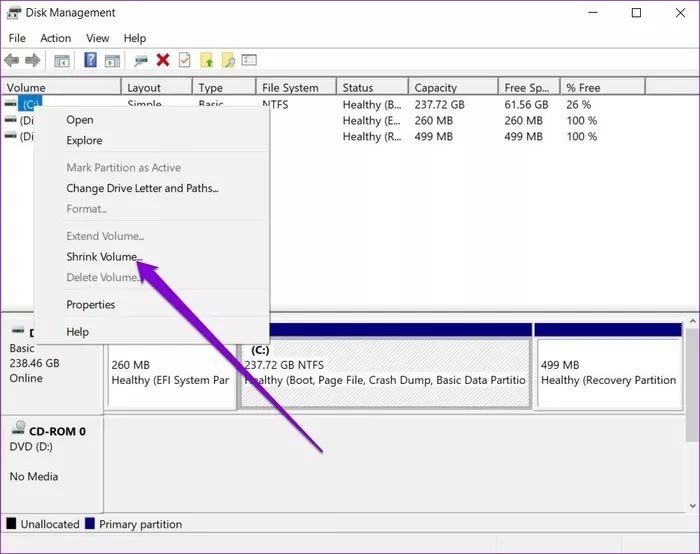
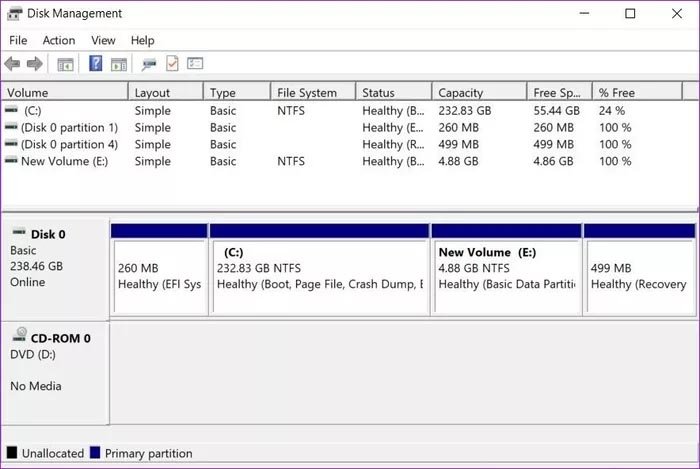
Now the Windows Disk Management program appears, which is used to manage partitions. All partitions on your device will be displayed in the list. In the next step, right-click on the drive you want to partition and then click on Shrink Volume option.
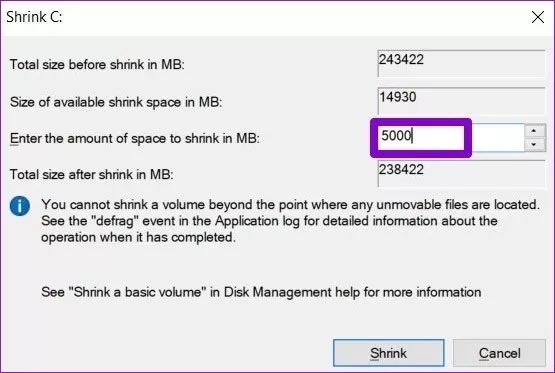
A window like the image below will be displayed where you can enter the desired volume to create a new partition. In fact, the value defined in this section will be the space allocated from the original drive to the new partition. Also, the initial drive space after partitioning can be seen in the second line. After entering the desired value, click the Shrink button.
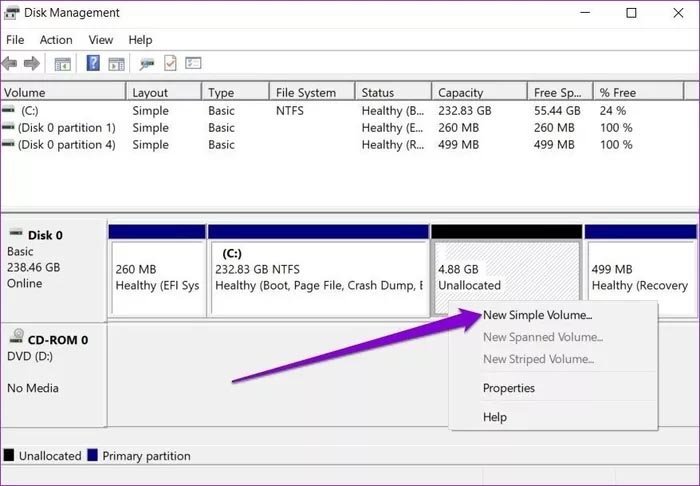
After partitioning the drive, you will notice that the new space in your device list is marked as Unallocated space in black. To assign this space to a new partition, right-click on it and then select New Simple Volume from the options in the list.
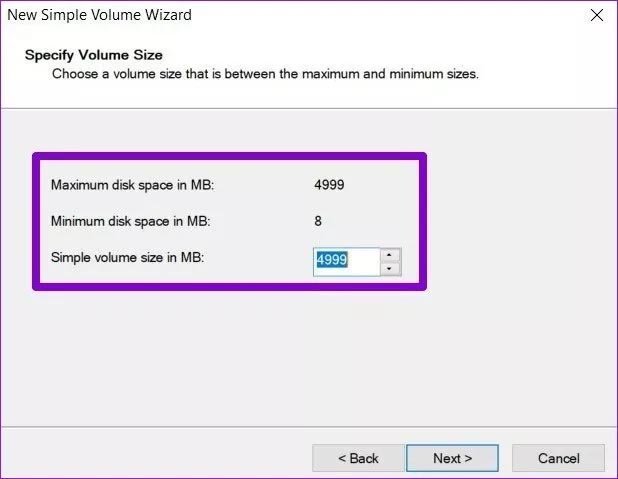
In the next window, you must enter the amount of unallocated space to be placed in the new partition. By default, the entire amount of said space is considered; But if you want to create several partitions, you should consider the amount you want for each one. After that, click on the Next button.
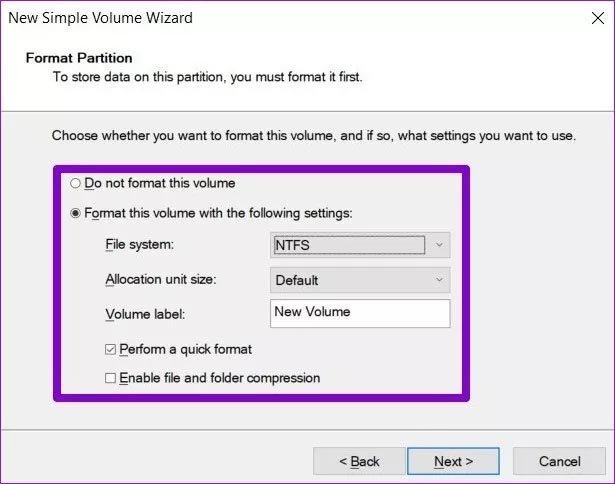
The next step will be to specify the details of the new partition. In the Volume Label section, you must define your desired title for the partition. In the File System section, the type of partition can be selected and it is recommended to set it to NTFS. After finishing the mentioned items, click on the Next button.
The primary drive is now partitioned into a new partition. If you don’t use all the unallocated space, you can repeat the above steps to define a new partition.
Remove partitions in Windows 10
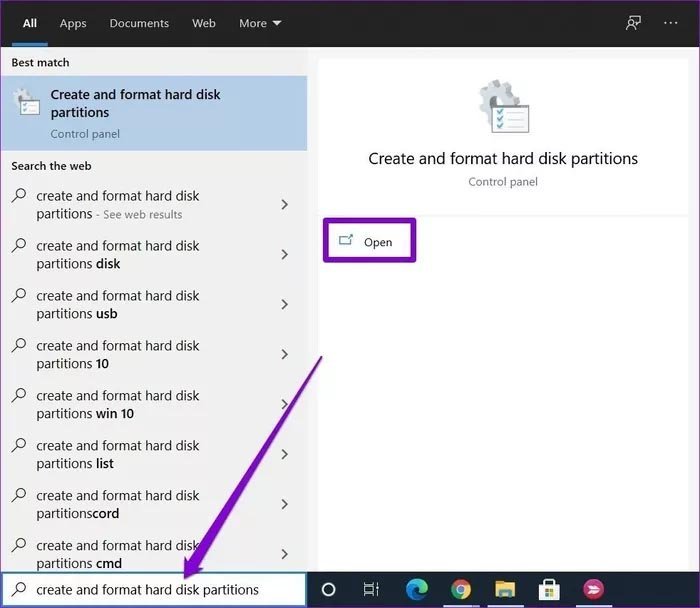
Disk Management program is not only used to create new partitions and provides other features needed for partition management in Windows, including deleting them. To start, enter the following phrase in the Windows search menu and then press the Enter key:
Create and format hard disk partitions
On the opened page, you can see the list of all partitions on your device.
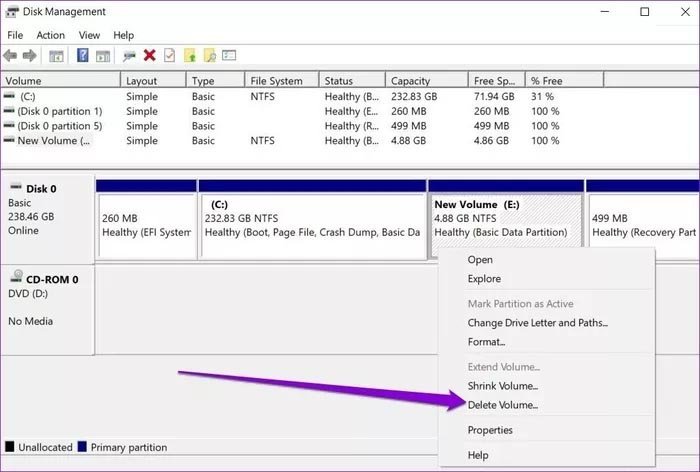
Right-click on the partition you want to delete and then select Delete Volume. Click Yes in the warning window that opens.
After deleting the partition, its space will be marked as unallocated and in a different color. Now you can add this space to other partitions or create a new partition with it.
Integrating partitions in Windows 10 (first method)
If you regret creating multiple partitions on your system, you can simply merge them together. There are two ways to do this, each of which will be explained separately.
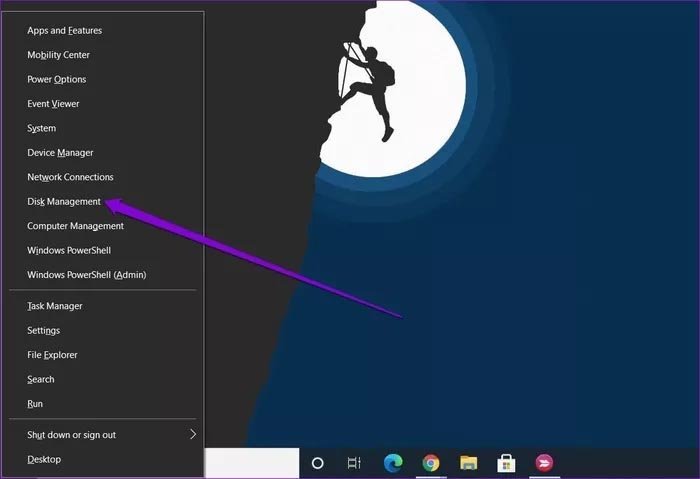
In the first method to merge partitions, we go to the Disk Management program again. To begin with, you need to remove one of the partitions you want to merge with another, so it is better to transfer the data in it to another location. To delete the partition, use the steps mentioned in the previous section. To run the partition management tool, you can also use the shortcut key Win + X and then select the relevant option in the list.
Like the previous sections, you will see a list of all system drives and their partitions. Right-click on the desired partition that you want to increase its volume, and then select Extend Volume from the items in the list.

In the Extend Volume Wizard window, enter the amount of unallocated space and then click Next.
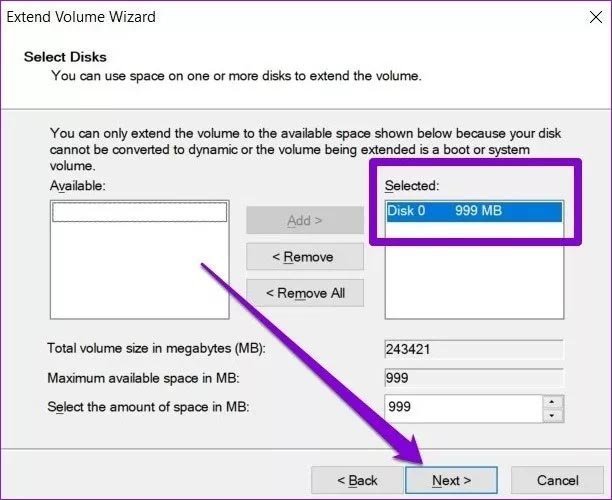
Now, the unallocated space that was the result of deleting one partition will be added to another partition and in fact two partitions will be merged with each other; But note that this process is done by erasing the information in one of the partitions.
Integrating partitions in Windows 10 (second method)
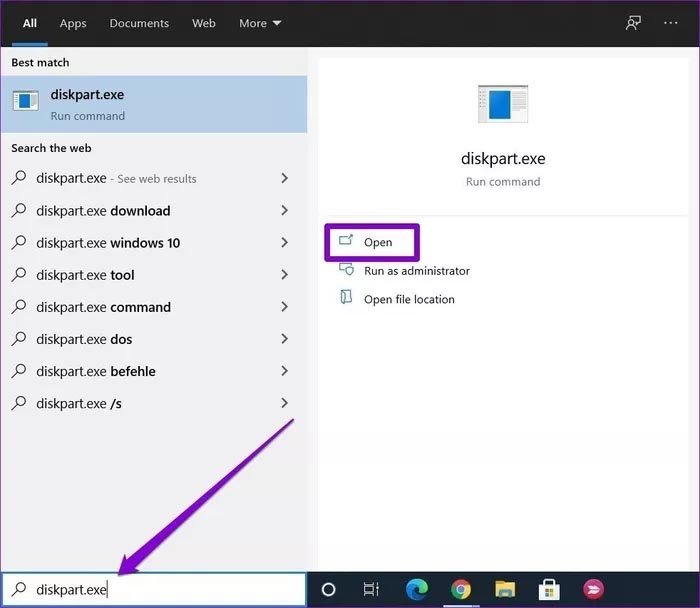
To merge the partition in Windows 10, you can also use the Command Prompt tool, which, although it does not have a graphical environment, displays more details. To start, click on the start menu and then enter the word diskpart.exe and finally press the Enter key.
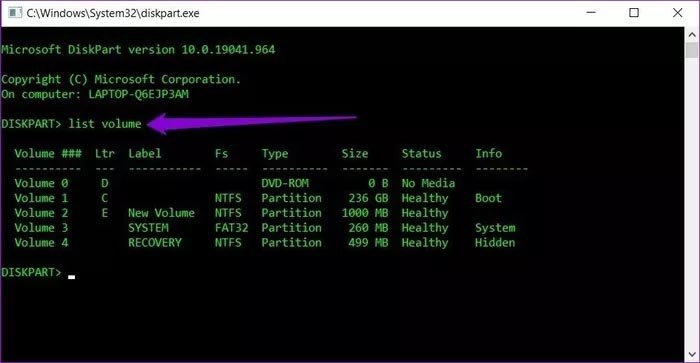
In the displayed window, enter list volume and press Enter. A list of available partitions on the device will now be displayed.
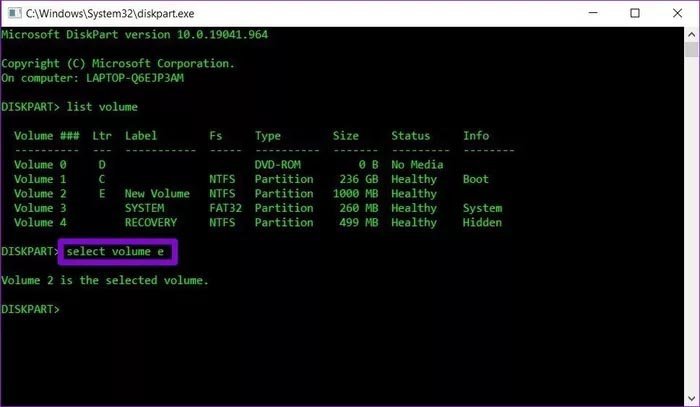
To merge two partitions with each other like the previous method, we must first remove one of them. In this regard, enter the following statement in the console:
Select volume DiskLetter
In the above command, replace the DiskLetter with the name of the desired partition to delete.
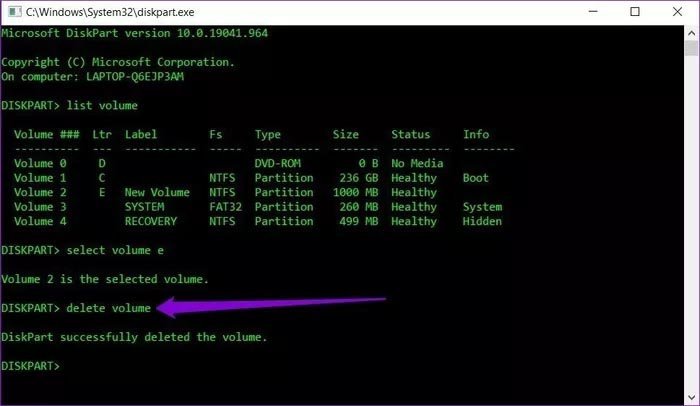
After that, type the delete volume command to delete the selected partition. Obviously, by doing this, the information in the partition will be deleted. Now the partition is ready to merge with another partition.
Now again using the previous command, select the desired partition to increase the volume and finally type the word extend and press the Enter key.
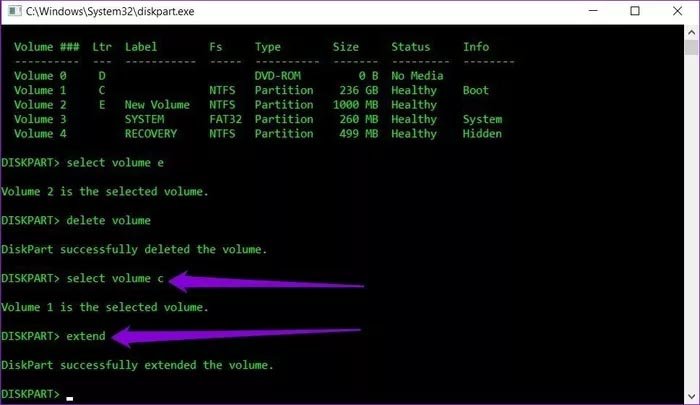
If you have done all the mentioned things correctly, a message will be displayed indicating that the process has been completed successfully.
Note that some of the things said In this training, the information on the device’s memory may be deleted; As a result, it is recommended to make a backup copy of your data or transfer them before starting work.