
Welcome to the important news site.
According to the latest reports, almost 95% of the share of conference presentation software in the world market is related to Microsoft PowerPoint, and this program is installed on more than one billion computers. Therefore, it is not strange that many people are familiar with it and use PowerPoint.
But a trick that maybe few people know is converting Microsoft PowerPoint presentations to video format; You can save the PowerPoint files you created as a video and then display them. If you like to learn this trick, stay with us until the end.

Before starting the training, it is good to know that Microsoft PowerPoint is a tool for making presentations. Create the files you want using sound, image, video, text and various contents and present them in various conferences.
To save PowerPoint as a video, you must first create a presentation using the program. For convenience, just download this file . After opening the file, run it and click on the File option [upper right].
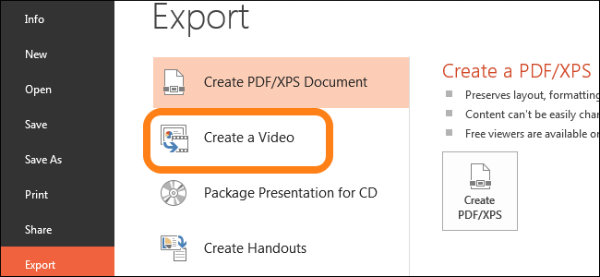
Now, unlike usual, you go to the Save or Save As section, choose the last option, Export, and then click on Create a video. This will open a new window with two different menus and an option to set the amount of video time.
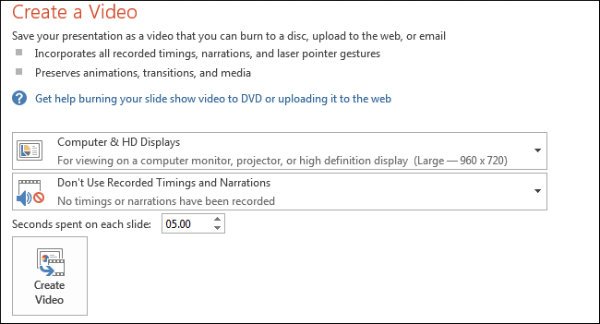
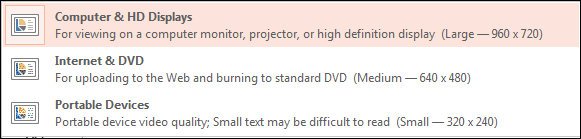
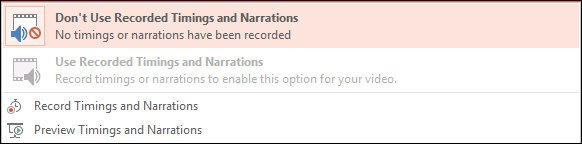
In the first menu, you can specify the quality and resolution of the video you want to make from among the different options. The second menu allows you to delete or change the audio recorded for PowerPoint [the same narrator] and the time interval between slides.
Of course, don’t forget that to use the second menu, these features must be active in the slide you made, and the example given at the beginning of the article does not have them. As the name suggests, the video time setting section shows the amount of time that all slides are displayed.
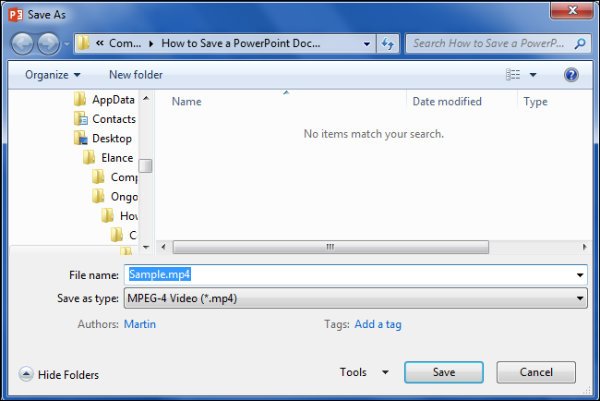
This part has been set to 5 seconds from the beginning and you can change it. After completing all these steps, just click on the Create Video button. With this, you go to the step of saving the video; Choose the address you want and then press Save.

After you click on Save, a small bar will be displayed at the bottom of the PowerPoint window, which shows the process of making the video. Wait for the bar to fill up to finish making the video you wanted. Now you can go to the address where you saved the video and watch it.
Just remember one important thing. The higher the number of PowerPoint slides, the longer the video will take up, and the larger the volume of your system will be. But in any case, this method is a good trick to share PowerPoint files on YouTube or Facebook.

Read more:
We hope you enjoyed the Office training materials. Check out our other articles.
