Welcome to the important news site.
GIF files are considered one of the most widely used formats on the Internet, which are widely used on various platforms such as social networks and messengers. This format, which can hold up to 256 colors, has become very popular among users due to its ability to display animation and can be used to share short videos. There are many ways to make gifs on the computer with the help of image editing software or special tools, and in this article we mention 4 of the best ones.
Gif creation on computer with GIPHY
There are various dedicated tools for making gifs on the computer, which provide various features. One of the most popular of them is the GIF Maker tool of the GIPHY website, which can easily convert videos into GIFs. There are many similar versions like Giphy that you can use if needed. Note that each service has its own limitations; For example, on Giphy, you cannot convert videos longer than 15 seconds. So, before choosing a service, it is better to weigh its features and limitations according to your needs.
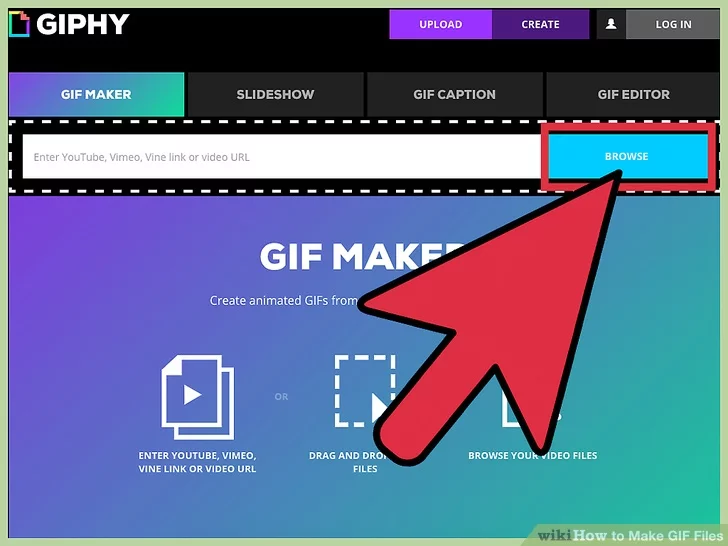
1. To get started, visit the GIF Maker page on Giphy.com. You can also access the said page by visiting the GIPHY site and clicking on the GIF MAKER tab.
2. By clicking on the Browse option, you can upload the desired file from your computer memory to be converted into a gif. Note that the selected file must be between 0.5 and 15 seconds. Also, if the desired video is available online, you can enter its link in the box next to Browse. Giphy supports popular video sharing services such as YouTube and Vimeo.
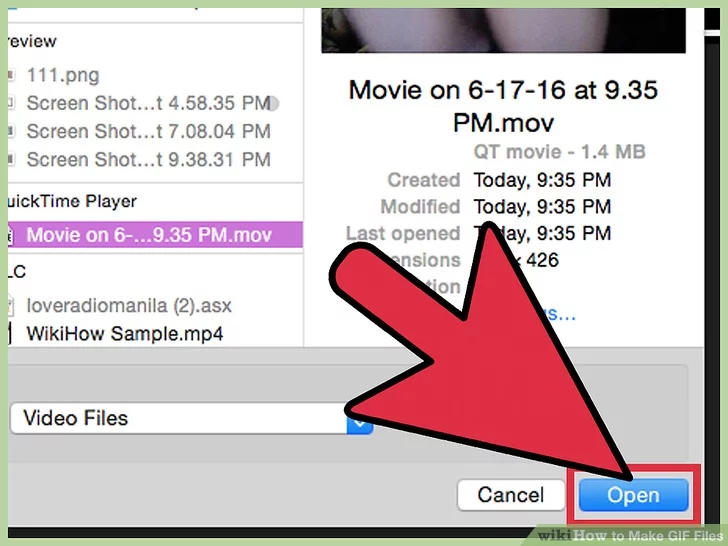
3. After visiting the location of the desired video in the device’s memory, select it and then press the Open key to start the uploading process.
4. Each site offers different features before making GIF images, which usually include start time and total file duration. This process may be adjustable only through a slider or placed separately.

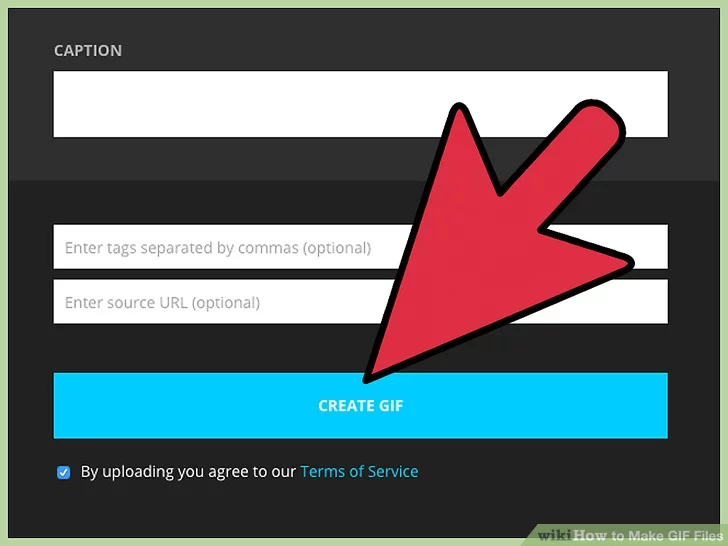
5. Most gif maker services provide the possibility of adding text to videos, which is available under the title Add Caption or Add Text. You can also define label and source for your file.
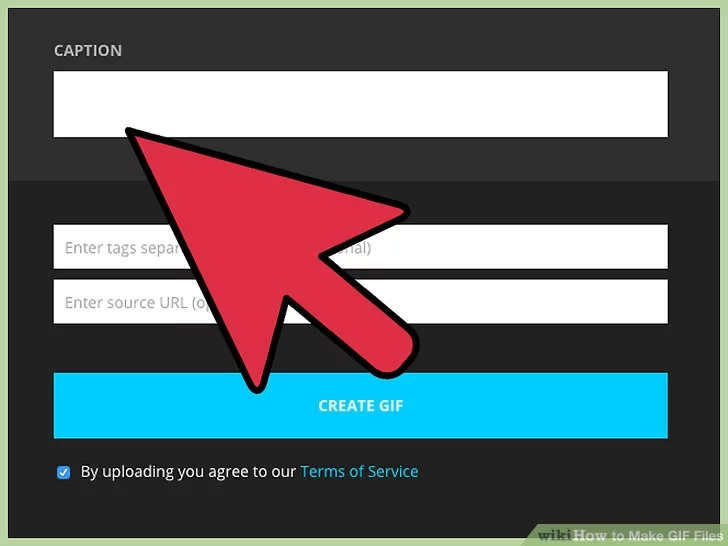
6. After completing the previous steps, click on Create GIF option so that the save offline menu will appear. Next, choose a name for your file and click on the Save button. Note that if the size of the final file exceeds 10 MB, it will be saved with the GIFV extension; But you can still use it as a normal GIF file.
Make GIF on PC with GIFMaker.me
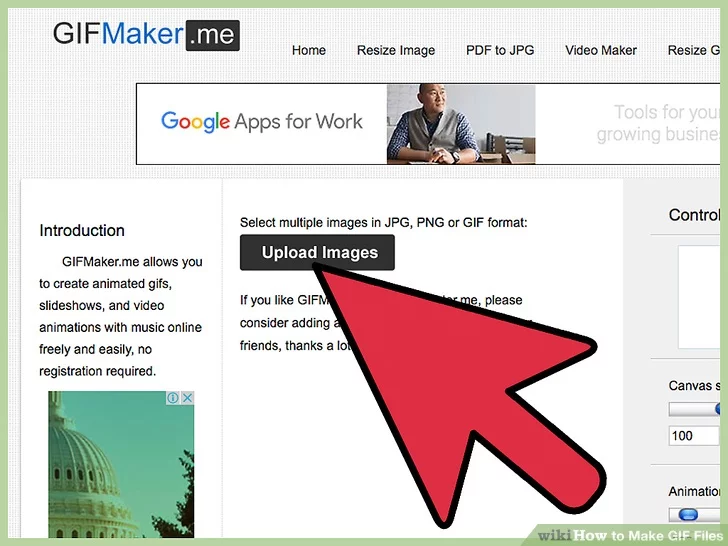
Using ready-made videos is not the only way to create GIFs on the computer, and you can also use a collection of images to create GIFs. The website GIFMaker.me is one of the best examples for doing this, which is freely available to users. Note that before starting work, you must have the images on your device’s memory; So if they are on the internet, you should save them.
1. Go to the Gifmaker.me website and click on the Upload Images button. Now, on the opened page, select the desired images and then press the Open key to start the uploading process.
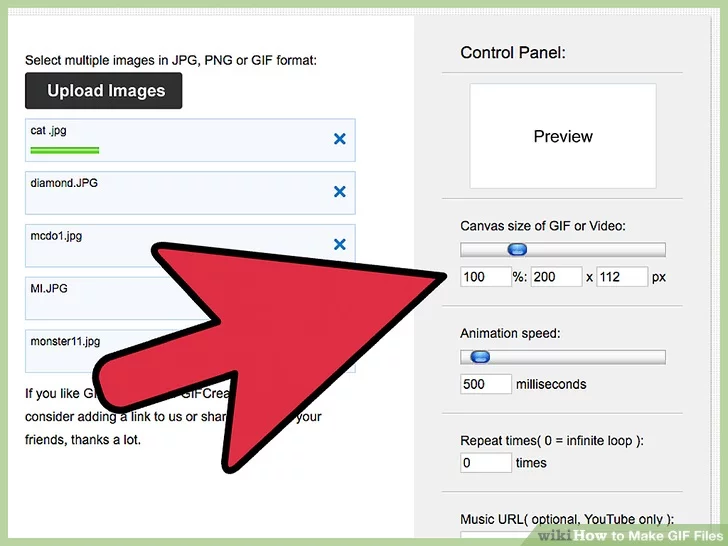
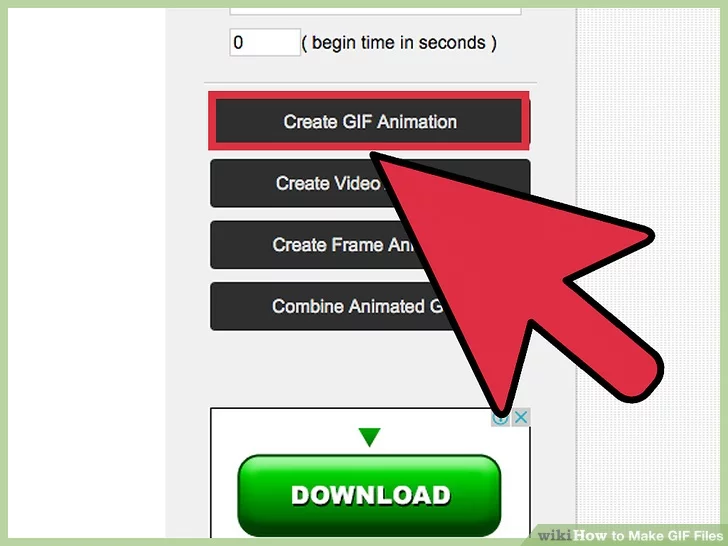
2. After uploading the images, you can edit the settings related to them before making the gif. For example, output resolution, number of repetitions and animation speed are among the things that can be changed. If you set the number of times to play to zero, it will repeat indefinitely.
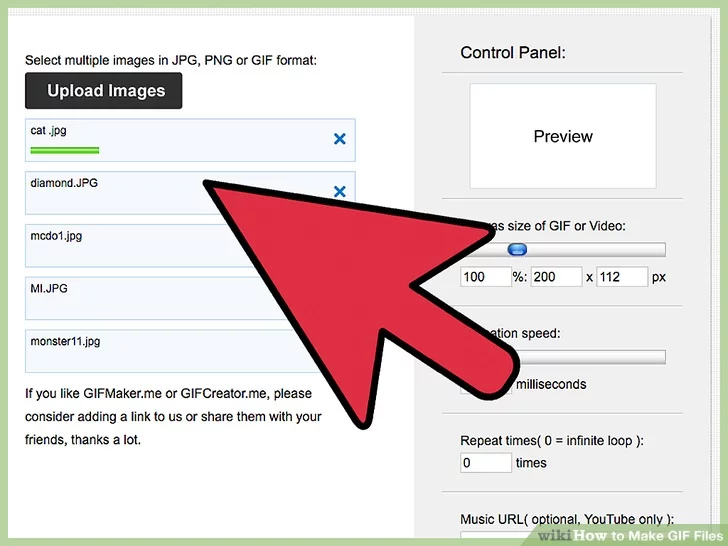
3. If needed, you can upload more images using the same method as before. Usually, most of the online services for making gifs also support drag and drop (Drag & Drop) and you can upload them by dragging your files into the browser window. You can also change the order of images. You will have access to a preview of the output file in the Preview window.
4. After finishing the editing process, click on Create GIF Animation option to open the offline save window. Now choose the desired name for the file and then press the Save button.
Creating GIF on computer with GIMP software
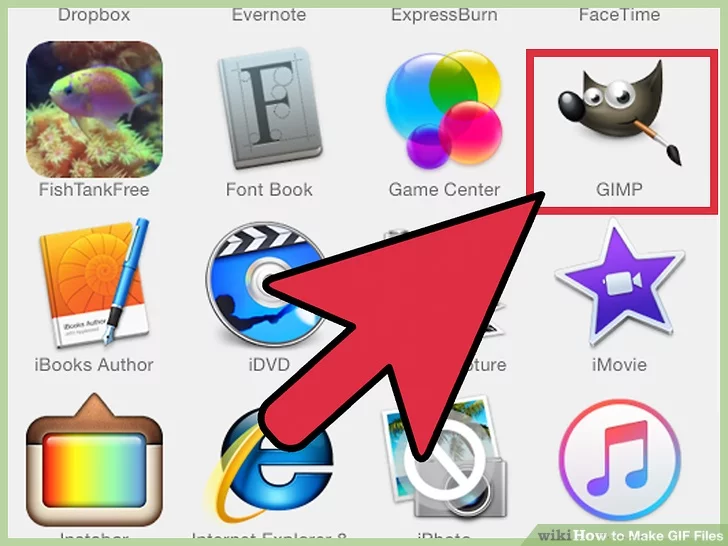
GIMP is an open source image editing software that is free available for various desktop operating systems such as Mac, Linux and Windows. contract. It is clear that with the help of this program, you can create more professional GIF files. To download it, you can search for GIMP in Google or go to the Gimp.org website and then enter the Downloads section.
1. After downloading and installing the software, click on its icon to open it.
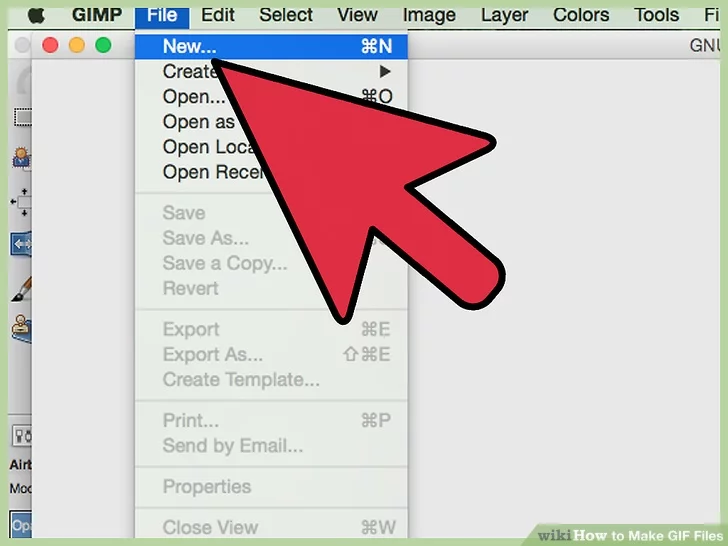
2. Next, click on File option in the upper toolbar and select New option from the opened menu. Now a screen with image settings will be displayed. Enter the desired resolution indicated by the suffix px (abbreviation of pixels). In front of the expression Fill with, choose the desired color for background. Finally, press the OK key to create a new image.
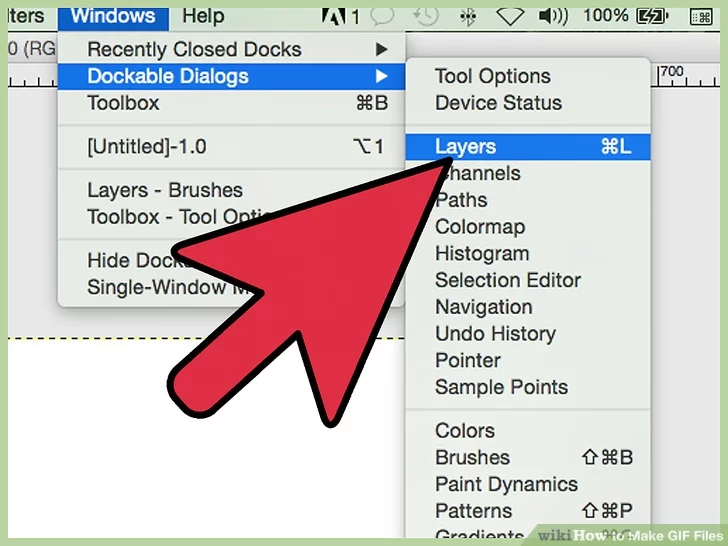
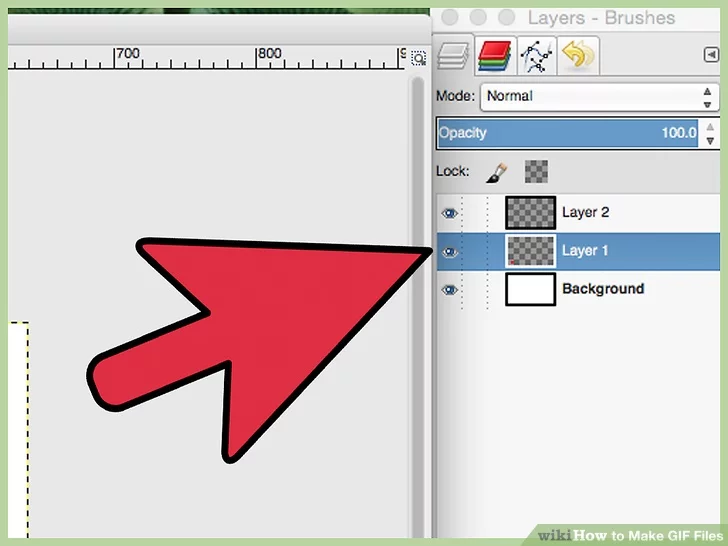
3. If you can’t see layers, you need to enable it. To do this, click on the Windows option in the upper toolbar and then click on the Layers option from the Dockable Dialogs section.
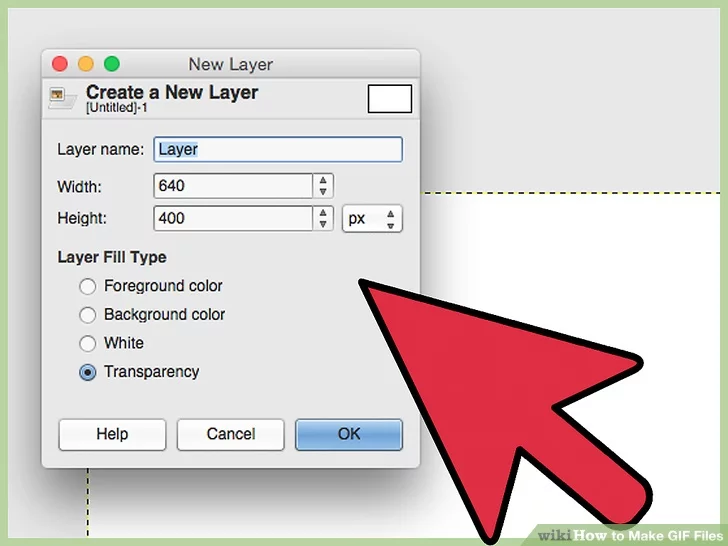
4. Each part of your animation should be on a separate layer. To create a new layer click the paper icon in the lower left corner of the Layers window to display the New Layer screen. For easier moving between layers and distinguishing them from each other, you can enter your desired name for that layer in the Layer name field. To ensure smooth display of the animation, select the Transparency option under Layer Fill Type. Finally, click the OK button to create a new layer.
5. Now you can add an image to the created layer. Also, if needed, you will be able to draw your desired shapes with the brush tool. To insert text into the layer, click on the A icon in the side toolbar and then click on the area where you want to write something. Note that whatever you put in a layer will be displayed simultaneously. After finishing the editing, you can adjust the transparency of the desired layer by changing the Opacity value in order to achieve the desired result.
6. Now you can create a new layer and continue this until you get the desired result. Note that the name of the layers should not be repeated.
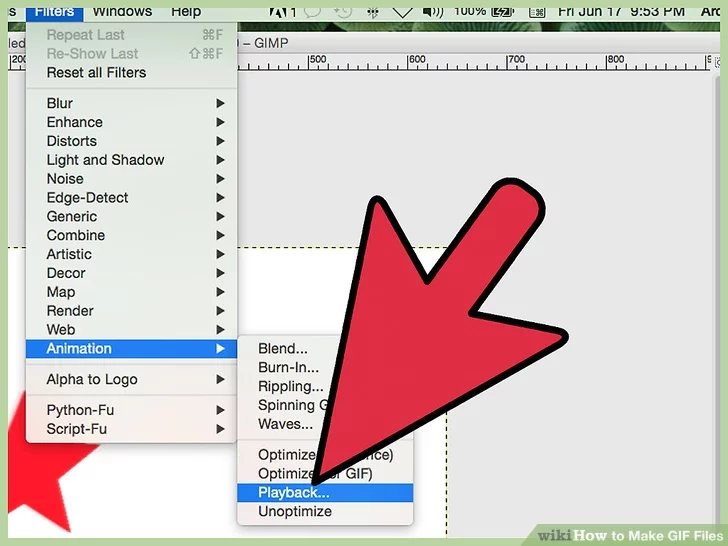
7. When you are done creating and editing layers, you can preview the output file. To do this, first click on the Filters option in the upper toolbar and then choose the Playback option from the Animation menu. The preview viewed is made up of the current layers; As a result, by changing them, the preview will also change.
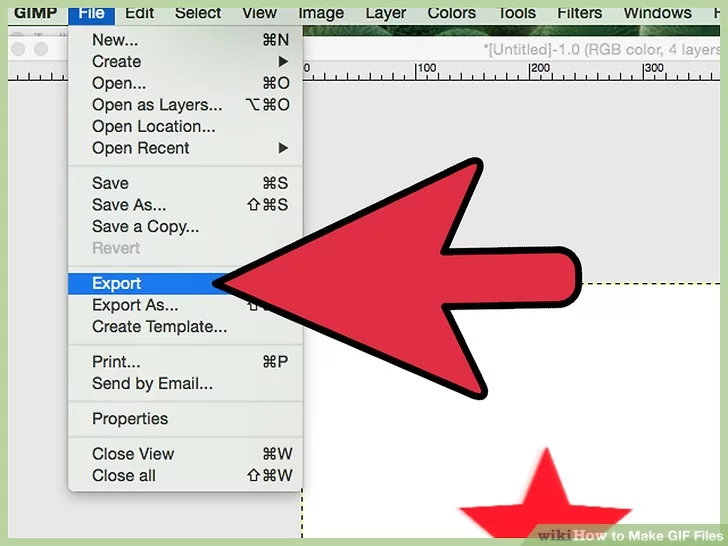
8. To prepare the output file in gif format, click on File option from the upper toolbar and then choose Export option. Click on the GIF image option from the opened menu and make sure that the As animation option is checked. If you want the GIF file to play repeatedly and indefinitely, check the Loop Forever option. In the section Delay between frames where unspecified, enter the amount of time required to display each frame (layer) in milliseconds. By default, this value is set to 100 milliseconds and may seem a bit fast; As a result, you can use longer values such as 300 or 600 milliseconds. Finally, click the Export button to prepare the output.
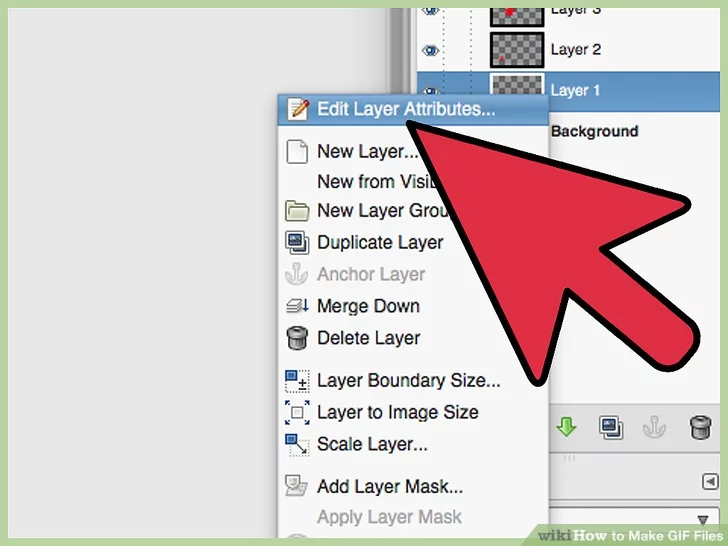
9. If you don’t want the playback time of each frame to be the same, you can consider custom values for each layer. To change the display time, click on the desired layer name in the layers box and then select Edit layer attributes from the drop-down menu. Next to the name of the layer, enter the desired time directly without spaces, such as LAYERNAME (200ms). Finally, click OK to apply the changes. You can repeat the same for other layers. To see the new state of the file, you can use the preview option according to the instructions in the previous sections and finally use the Export option to create an output file.
Creating GIF on computer with Photoshop software
Photoshop is another dedicated image editing software such as GIMP, which can be used to create GIF files. Of course, Photoshop is not the best option for making gifs on the computer by normal users; Because it is more complicated and its official version is not available for free. Although many people use the cracked version of this program, it still has disadvantages such as being too heavy, which makes it not the most ideal tool for creating GIFs.
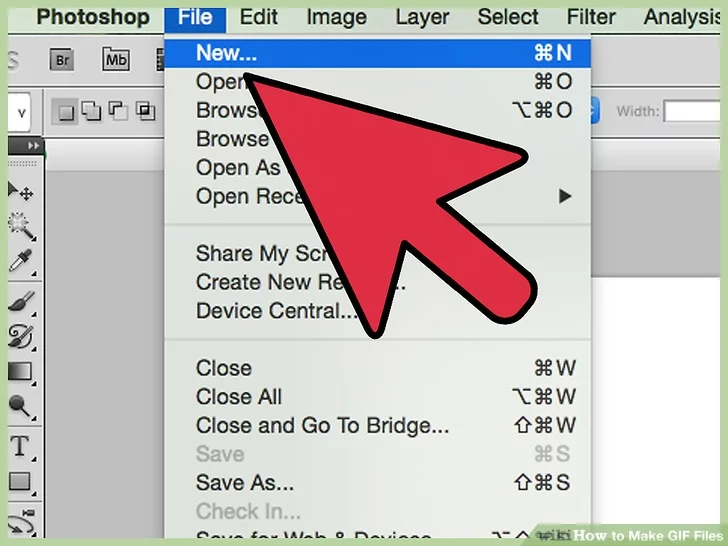
1. First, open the Photoshop software and then select the File option from the upper toolbar and click on the New option to create a new project. Define your desired name for the project in the Name field. Next, define the desired dimensions in the width and height sections (pay attention to the written unit such as pixels or inches). By clicking on the menu next to the word Background, choose the background color for your image. Finally, click OK to create a new file.
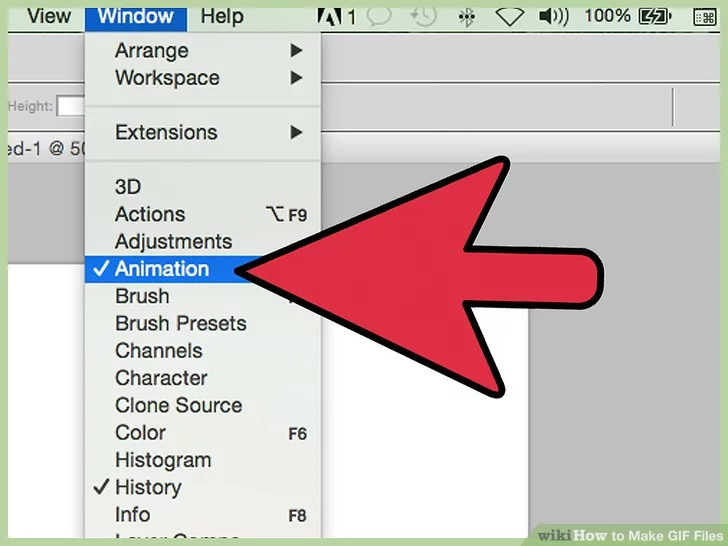
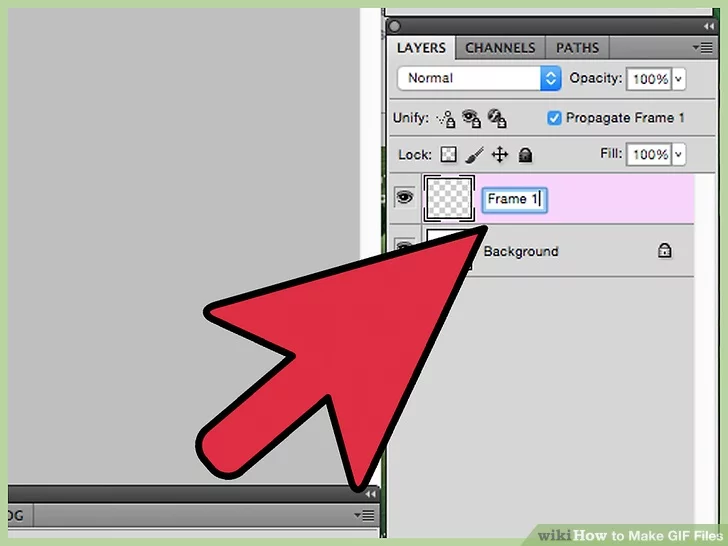
2. If the layers and animation window is not open, by clicking on the Windows menu from the top bar, enable the two options Animation and Layers. Now the layers panel will be visible on the left.
3. In the Layers panel, click on the “+” sign to create a new layer. Then type your desired name in the Name field. Set the Fill color value to Transparent or the background color. Finally, click the OK button to save the new layer. Note that each element of your animation must be in one layer; As a result, everything you put in a layer will be displayed as the content of a frame.
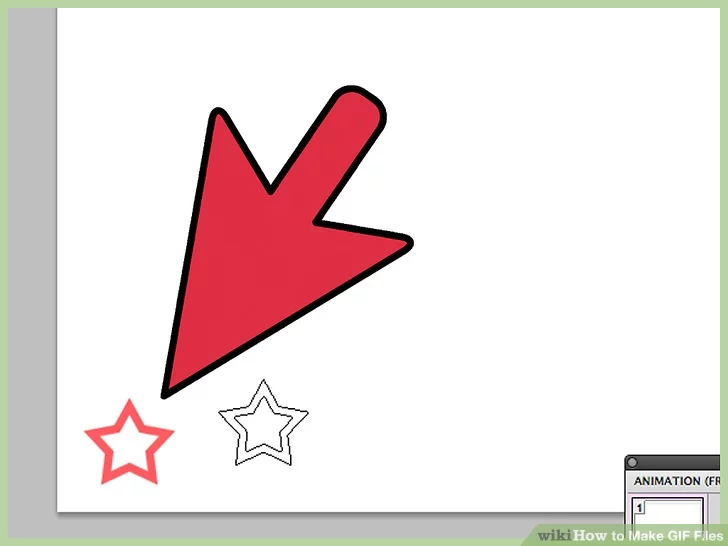
4. Using the brush tool, you can draw the desired shapes in the selected frame. You will also be able to add text to the layer by clicking on the T icon.
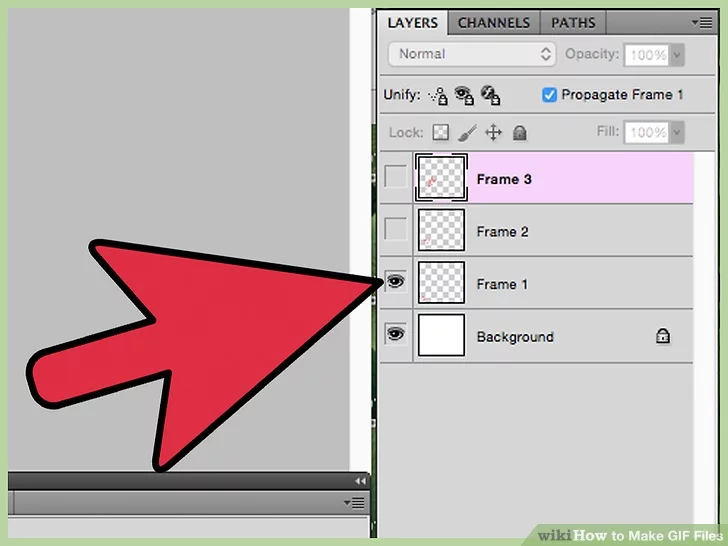
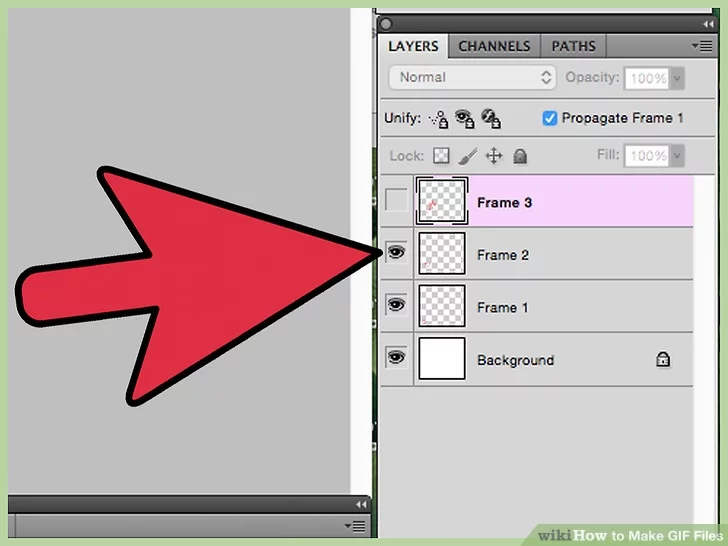
5. Create a new frame using the method mentioned in step 3 and continue this work until you reach the desired result. If the next layer with a slight difference should have the previous frame, you can right-click on the old layer and select Duplicate layer to create a new frame with the content of the previous layer.
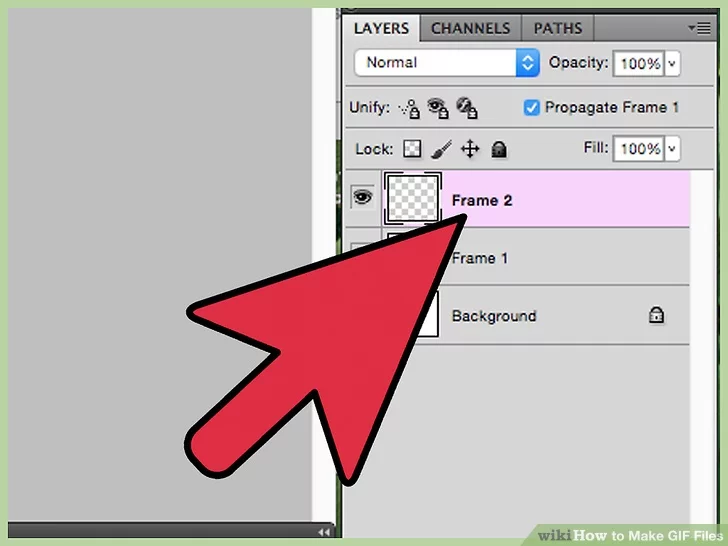
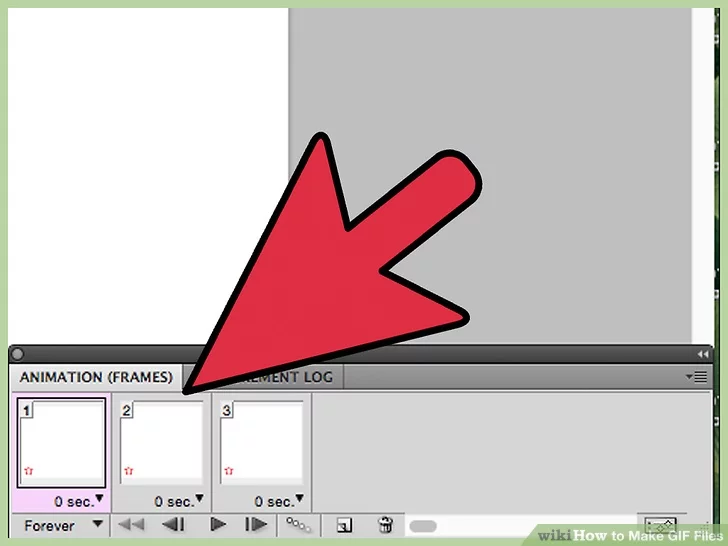
6. Visit Animation Panel which is visible at the bottom of the screen, and then click on a small square rectangular mark to create a new frame. Make frame as much as your layers.
7. Click the first frame in the animation panel to change the content. As you can see, this frame contains all layers. By clicking the eye mark on the left side of each layer, hide the extras to remain only the first layer (for the first frame). You can also edit the time of each frame (in seconds) by changing its value under its small image.
8. Repeat the trend for other frames. Don’t forget to set the required time for each frame.
1. Ticking Player in Animation Panel , you can see a preview of the output file.
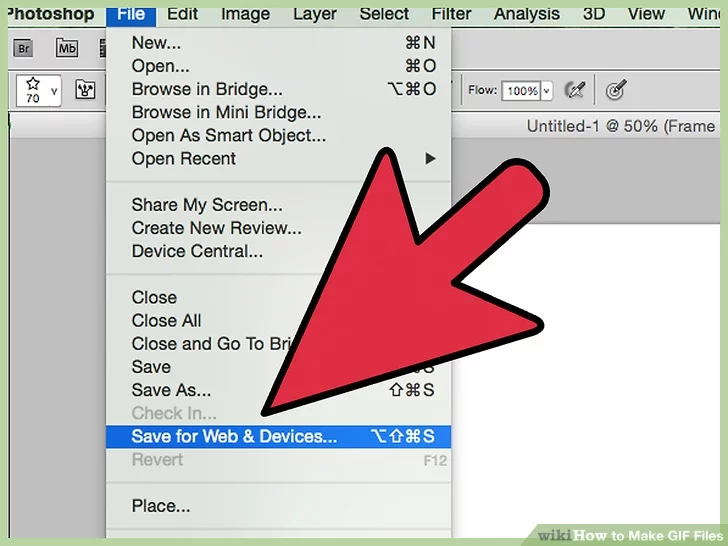
1. After completing the edits, select the GIF mode in the Preset menu by opening the File menu and selecting the Save for Web and devices. Finally click the Save key to save the output file.
