
Welcome to the important news site.
Microsoft Word and Excel remain like doors and boards. They pair well together and you can achieve excellent and interesting practical features by combining their features. Especially when you want to add a series of numbers and figures to a normal Word text, Excel will help you with mathematical calculations.
Getting help from Excel in the Word window is not a complicated task at all, and surely if you have searched the Word settings, you have seen the “Excel Spreadsheet” option. But if you haven’t even heard of this option before, it’s still not a problem. We will continue to teach you how to use Excel features in Word and tell you everything you need to know about this topic.
Well, to start, you need to go to the “Insert” tab and through the upper part of the page, find “Table” and click on it. This will open a small window that contains several different options. Don’t worry about the rest of the options. Just search for “Excel Spreadsheet” and click on it. By doing this, you will see that a page, similar to what we see in Excel, will appear in front of you.

If you look carefully, you will see that all the features available on the Excel platform can also be seen in this window and you can have full access to all of them. Assuming, for example, by creating an Excel page in Word, you can add a series of numbers together using the famous “Sum” formula and average them using another formula.
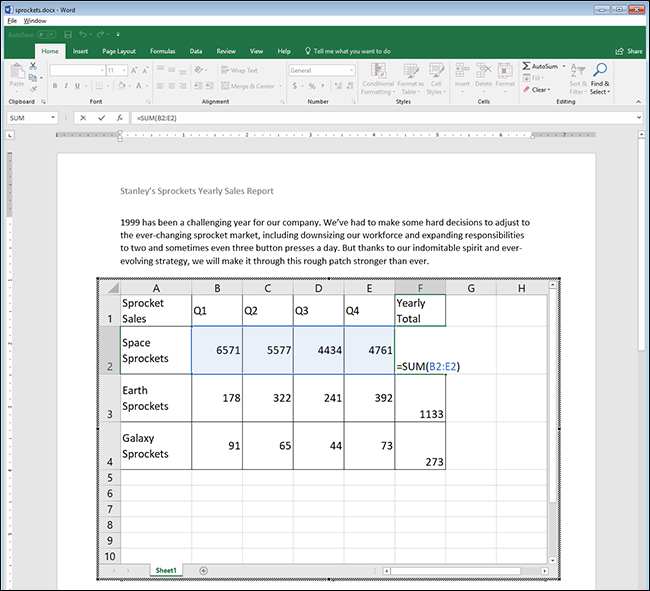
It is interesting to know that you do not have any restrictions to add to the columns and rows of this Excel window. Rather, you can have as many columns and rows as you want. Just to achieve this, you need to grab the corners of the Excel window and drag it in different directions to make it bigger. As simple as that.

But don’t think that the work is over. Since the created document is a Word file, its readability and beauty should be preserved. In simpler words, you cannot leave an asymmetrical and not very beautiful table in the middle of a text. In addition, your table should be made in such a way that it looks good in the printed version of the document.
Fortunately, Word is full of interesting features that can be used to change the dimensions of the table without reducing the number of columns and rows, and also consider the right place to display it. We have said almost everything. There is only one special item left that might come in handy sometime.
That’s when you want to use a pre-made Excel file in your Word document. It is interesting to know that Microsoft has put a very good shortcut for you. Just go to the “Insert” tab and click on the “Object” key among the available options.
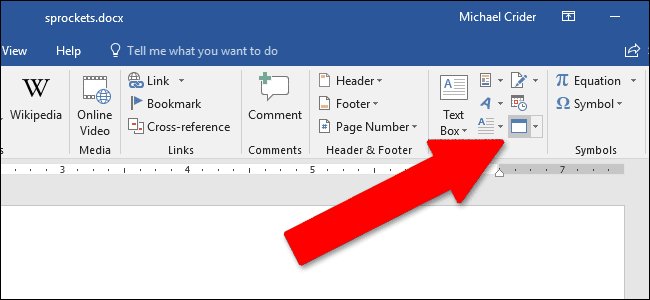
With this, a window will appear in front of you, if you look carefully, you will see a tab called “Create from file” in it. Enter the mentioned tab and click on the “Browse” button from there. Now, just look for your Excel file on the hard drive and select it and add it to your document.
Read in Digiato:
We hope you enjoyed the Office training materials. Check out our other articles.

