Welcome to the important news site.
The tools available in Windows that are used for backup have a very good performance. In addition to these tools, you can also find other software that you can use for backup.
Backing up Windows can result in an image file that is similar to a picture of all the files and data on the hard drive. One of the advantages of taking an image from Windows is that when the system has a problem, you can restore the image taken to restore the system to a state that was working well. Using this method, you don’t need to reinstall Windows or your applications.

Of course, taking an image from the system is not without problems. One of the problems is that you cannot use the captured image on other computers. Just as you cannot connect your computer’s hard drive to another computer and expect everything to work properly.
Some third-party software – of course, their professional and non-free version – provide users with significant features for backing up from Windows that are not available in normal backup using Windows.
But without using these softwares, you can backup your operating system and keep the related image. In this article, we are going to teach how to backup Windows operating systems. Do not miss this article.
Step 1: Run System Image Backup
The process of finding System Image Backup in Windows 7 is different from Windows 8 and Windows 10. So we have to explain the process of finding all of them:
Running System Image Backup in Windows 10
In Windows 10, click Start and search for Backup, and then select the option shown in the image below in the results found.

From the opened window, click on the Create a system image link.

Running System Image Backup in Windows 8
In Windows 8, click on Start and then search for file history. In the results, select File History.

In the opened window, select the System Image Backup link.

Running System Image Backup in Windows 7
Click Start and then click the arrow next to Getting Started. Now select the Back up your files option.

Click on Create a system image link from the opened window.

Second step: taking an image of the operating system
When you run the tool related to taking a backup or taking an image of the system, the continuation of work will be the same in all Windows.
When you run the tool for the first time, it will scan all your drives for an external hard drive or external drive (such as a DVD ROM). Select the location where you want the image to be saved and then click Next.

By default, this tool only backs up the operating system drive. You can select other drives that you want to back up as well. You should remember that by adding each drive, the volume of the final image will increase.

On the next page, you must confirm your operation. On this page, you can also see the final size of your image. If everything was in place, you can click the Start Backup option to begin imaging the operating system.

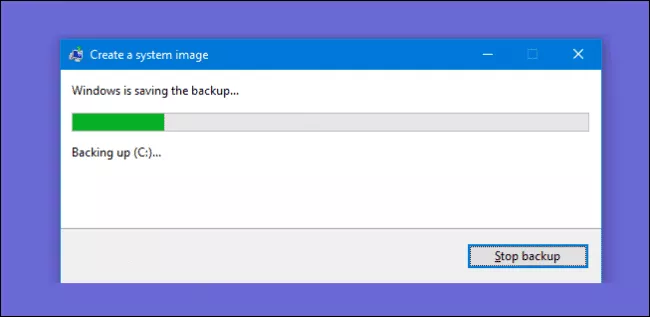
By clicking this option, you can see a bar that shows the backup process.

This process may take some time. In the example shown in the images, the size of the image is 319 GB. The process you see in the picture took about 2.5 hours. According to the power of the system and the selected volume for backup, the required time will be different.
Step Four: Create a Windows Repair Disk
When the backup is finished, Windows will show you an option to create a Windows repair disc. You can use the said disk to restore your faulty operating system to a working state. We recommend that you do this and create a Windows repair disc.

Select the drive that you want to convert into a Windows repair disk.

Whenever you want to restore your operating system using an image taken, many options will appear for you through this disk.

As you can see, backing up the computer and creating an image of the files stored on the drives is a time-consuming task. Therefore, we recommend that you do this when you do not need to use the computer.

