Welcome to the important news site.
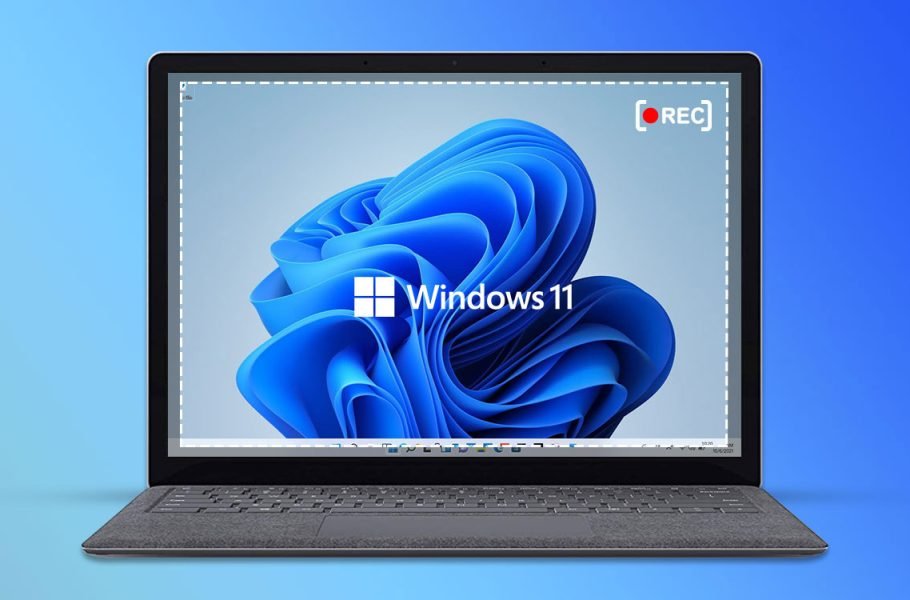
Before the release of Windows 10 by Microsoft, there was no independent internal screen recording tool in this company’s operating system; But after the appearance of Xbox Game Bar, the situation changed compared to the past and it became much easier to do this. The said procedure has been continued in the new version of Windows and users can use internal features along with other peripheral tools such as Screen Recorder Windows 11, which we will continue to explain how to use them.
Types of Windows 11 screen recorder
When you want to record screen content in Windows 11 along with sound, you have several different options, including Xbox Game Bar. Of course, if you need more tools and maneuvering power, you should go for the specially developed software to do this. OBS, TweakShot and ShareX are some of the most popular programs in the mentioned field that professional users take advantage of. Also, special graphics card software provided by their manufacturers can be used to record game content, and their two main examples include GeForce Experience for Nvidia products and Radeon Software for AMD cards.
There are fundamental differences between the way the said programs work, and if we want to compare the Xbox Game Bar with dedicated examples, we will notice many differences. Windows 11 built-in screen recorder is on the operating system by default, and the user does not need to download and install it separately. It is also considered a lightweight tool and will not impose much processing load on the system. Its user interface is also simple and does not require complex settings for initial setup at the start of work; As a result, most users without previous experience and skills will be able to benefit from its capabilities.
Xbox Gamebar is a light and practical screen recording tool in Windows 11.
But the internal screen recorder of Windows 11 also puts very serious limitations in front of its users. For example, there is little control over the quality of the recorded content and it lacks the basic features associated with advanced encoders. Also, if you are not even busy using it, it will automatically run in the background and will bring additional processing load. On the other hand, dedicated screen recording software provides much more control over various aspects for the user and most aspects such as quality, bit rate, resolution and frame rate can be adjusted in them. Of course, such programs have a complex user interface and their initial settings are a bit difficult. Also, to record high-quality videos, you will need powerful hardware in addition to a dedicated graphics card.
Windows 11 built-in screen recorder
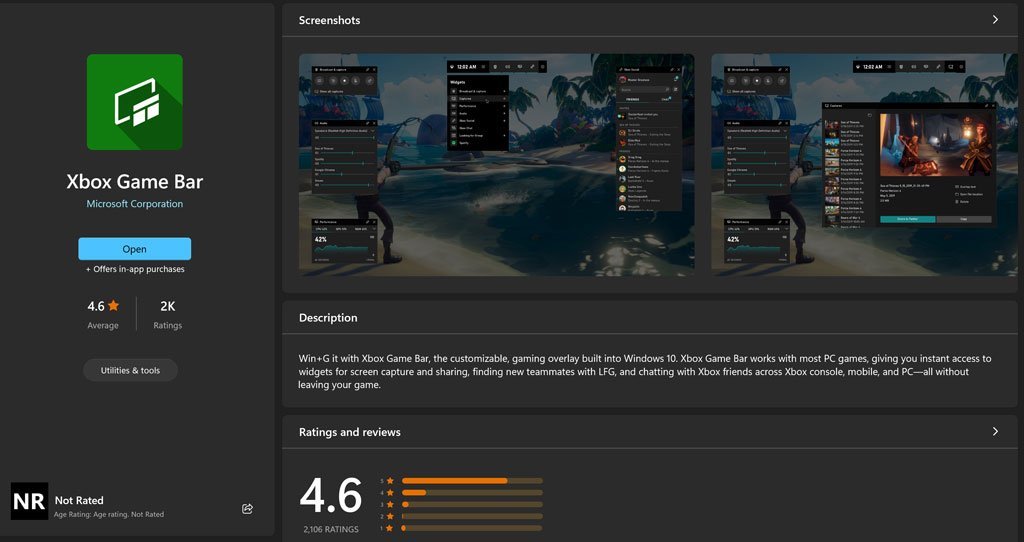
As mentioned in the previous section, Xbox Gamebar is considered as Windows 11’s built-in screen recorder that runs as a background program. This tool consists of the central control bar, which is placed in the upper part of the screen, and several side widgets appear along with it to control different parts. To start recording screen content through this tool, just follow the steps below.
1. First, type Xbox Game Bar in the Windows Start menu search bar and click on the first displayed title. You can also quickly run this tool by pressing Win + G combination key.

2. In the upper left corner of the screen, there will be a widget called Capture, which is intended to control screen recording.

3. Before starting screen recording, make sure Audio recording is turned on. To do this, click on the settings icon (gear) in the central toolbar in the middle of the page to access the game bar settings page.
4. In the settings window, click on Capturing from the left menu. Now you will see a section titled AUDIO TO RECORD on the right side of the screen. If you want only the sound of the game and the microphone to be recorded when entering the game, choose the first option. If you want all sounds to be recorded in different parts and programs, including the browser, activate the second option called All, and if you don’t want any sound to be in the output file, choose the last option, None.

5. After specifying the audio recording status, you can start the process of recording the screen content with the help of Windows 11’s built-in screen recorder. To start recording, just click on its icon (circle similar to the image below) in the Capture widget. The recording process also starts by pressing the combination key Win + Alt + R.

6. After starting the recording process, a new small widget named Capture Status will appear which displays the duration of the current recording process. Also, if you want to stop the recording process, you can click on the blue icon or press Win + Alt + R again. The microphone icon in this widget can control the sound recording status from the microphone, and by clicking on it, the sound recording through the microphone will stop; While recording the screen content continues.

7. After finishing the recording process, you will see a notification with the content Game clip recorded, which means successful saving of the output file.

8. To view the recorded files through Windows 11’s built-in screen recorder, you can click Show all captures in the Capture widget to be directed to the location of the videos. By default, videos recorded with Xbox Game Bar are saved in the following address; But you can change the default address by cutting the said folder and placing it in the desired location.
C:Users*your user name*VideosCaptures
Screen recording with Microsoft PowerPoint
Most users use the office suite and its programs such as PowerPoint on their Windows. Fortunately, PowerPoint software is equipped with a built-in ability to record screen content, which can act as an alternative to Windows 11’s built-in screen recorder. The steps to record the video of the display with PowerPoint are as follows.
1. After opening the PowerPoint software, click on the New option in the left panel and then choose the Blank Presentation option.

2. Click on the Insert tab on the top toolbar of the program and then select the Screen Recording option from the Media section.
3. Now you can specify the desired location to record the content and finally press the red button Record to start the recording process. If you don’t want the sound to be saved with the output file, set the Audio option to disabled.

4. To end the screen recording process, click the blue square in the top toolbar or press Win + Shift + Q. You can also click on the Pause icon in the toolbar to pause the recording.
5. Now the recorded video is placed in one of the PowerPoint slides. To save it outside the PowerPoint environment, right-click on the video and then select Save Media from the opened menu.

6. Select the desired location for the output file in the internal memory and then click the Ok button.
Screen recording with TweakShot Screen Recorder
TweakShot Screen Recorder software is a suitable alternative to the built-in screen recorder of Windows 11, which is specially developed to record screen content. This program is equipped with different modes that can be used to record the entire screen, a window or even a specific part. If you are looking for a suitable option for making educational videos and teaching files, this title can be suitable for you. Of course, you can also use the aforementioned features to record games or live streams.

1. To start, search for TweakShot Screen Recorder and download the program installation file for free.
2. After completing the software installation process, run it.
3. According to the image below, choose one of the available modes to record screen content according to your needs.

4. Click on the Quick Settings option to be redirected to the software settings page. In this section, you can control various things such as the use of watermark and logo, setting the quality of the output file, displaying or not displaying the mouse pointer, recording sound, etc.

5. After selecting the recording type and applying the desired settings, click on the red Record button to start the recording process.

6. After the recording process is finished, tap the Stop key to end it. You can now view your videos in the Recording tab and navigate to their storage location by clicking the folder icon.

Screen recording with ShareX
ShareX free software is another screen recording title that is available to Windows users for free and can be used as an alternative to Windows 11’s internal screen recorder. This program can provide output files in MP4 and GIF format, and along with a simple user interface, it offers acceptable features to users.
1. To free download the installation file of the software, just search for ShareX Download and get it from the manufacturer’s site.
2. After completing the installation process and entering the program, click on Capture from the left menu. Next, click on the Screen recording option to prepare the output file in MP4 format, and if you want to have a GIF format file, select the Screen recording (GIF) option.

3. Select the desired part of the screen to record the content. The recording process will start shortly after selecting the said part. To record a specific window, just hover over it until it becomes highlighted and then click on it.

4. To end the recording process, click on the red icon in the taskbar and then select the Stop option. Also, pressing Shift + Print Screen will stop the recording process.

5. Now you can select the output file from within the software itself to play its video. Also, by right-clicking on it and selecting the Folder option from the Open menu or pressing the Shift + Enter combination key, you will be able to refer to the storage location of the output file.

