Welcome to the important news site.
Ever accidentally quit Word 2016 without saving a document? In Word, Microsoft has provided ways for users to recover their lost information; You can recover unsaved files in just a few seconds.
In the following article, we decided to take a look at these ways. So if you want the documents you wrote in Word software not to be lost because of a small mistake, stay with us and the methods to recover unsaved files in Microsoft Word 2016.
How to recover unsaved documents?

The scenario is this; You have exited the Word software without saving your writing. Has all your hard work gone to waste? No. After you run Word, click File on the top bar and then click Open. Here you will see a list of all the Word documents you have saved recently.

Under the last file in the list, there is an option named Recover Unsaved Documents, select it. This will bring up a folder containing all unsaved documents in the last four days. Click on the document you want to recover and then click Open.
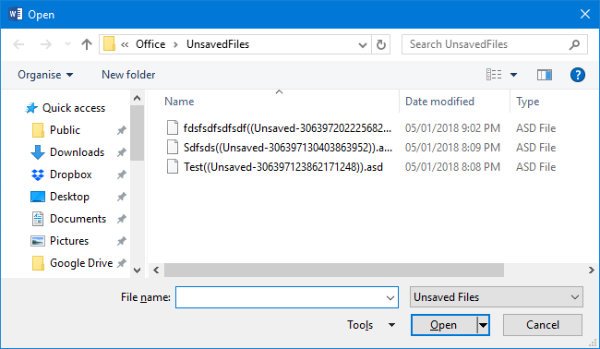
At this stage, a new page will open that shows the contents of the document and above it there is the message This is a recovered file that is temporarily stored on your computer. Just click Save As and save the document in the folder you want.

But if you cannot open the file with this method and you encounter an error, it is possible that the Word document is damaged. In these cases, after you have selected the unsaved document, instead of selecting Open (in the third photo), click on the arrow next to it and then click Open and Repair to automatically solve the problem.
Of course, if you want to see unsaved documents without opening Word, you can press Windows key + R to run the Run software. Enter the following text here and click OK to display the list of documents that you have not saved:
C:Users%USERNAME%AppDataLocalMicrosoftOfficeUnsavedFiles
Use AutoRecover
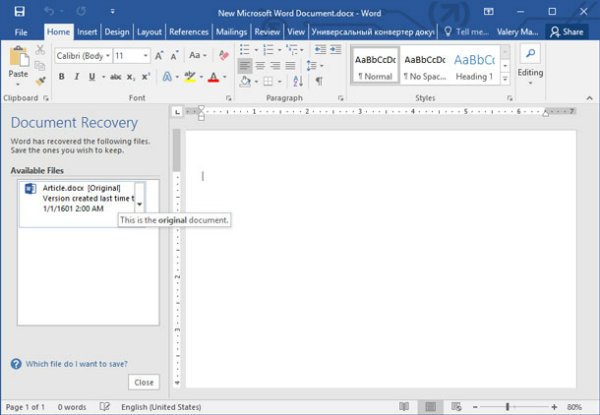
But when the system crashes or the power goes out, you can use the AutoRecover function to recover your data in office programs. To use this feature, after running the program, you will encounter the Document Recovery panel. This panel includes all available Word files with their title and time of creation.
You can click on any file you want to see their content. If it was a document that you decided to save, click on the arrow facing each file and click Save As. Now save the document in a desired path. Do not forget that the files of this panel may be displayed only once, so do not postpone the process of saving documents.
How to customize AutoRecover?
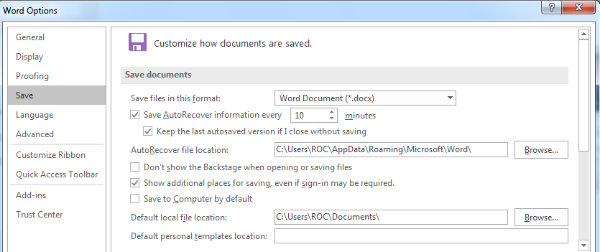
The AutoRecover feature is activated automatically, but you can also customize it. Open Word and click File on the top bar. Then select Options and go to the Save section. Here, if the Save AutoRecover information every X minutes option is not enabled, check it so that the Word file is saved automatically every few minutes.
X means the time you give yourself in the sentence above. By default, this time is set to 10 minutes, but you can change it for more certainty. Next, tick Keep the last AutoRecovered version if I close without saving.
At the bottom of these two sentences, you can see AutoRecover file location. This section is for where to save files saved by AutoRecover feature. If you want to change the save location, click Browse and specify the new path.
Read in the Digiato training section:
We hope you enjoyed the Office training materials. Check out our other articles.
